Showing posts with label back to school. Show all posts

Making a Digital Planner Work for You

Digital Planners:  Making them Work for You

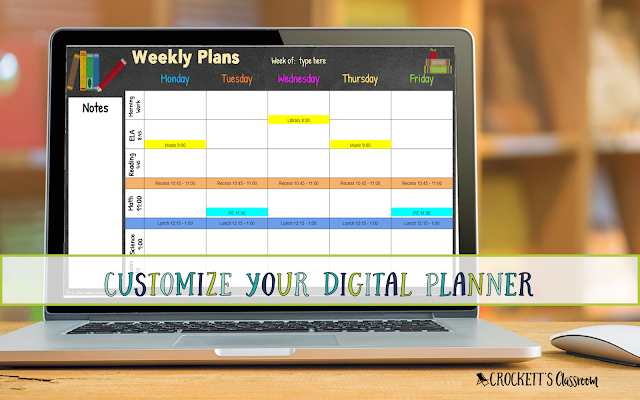
See how easy it is to customize a digital planner and make it your own!


One of the biggest advantages of digital planners is being able to customize it to be exactly what you need.  Customizing can be as simple as typing in your name and class information to adding columns and rows in a table. I’ve put together directions and a few videos that will help you customize your digital planner.


Before you begin customizing your digital planner I highly recommend making a copy of the original file and saving it with a new name.  This will preserve the original version.  You’ll want to keep the original untouched, just in case you want to go back and begin the customizing again.


The digital planner I’m customizing is in Google Slides, but the directions for PowerPoint would be almost the same.


Editing text boxes:   You’ll know a text box is editable when you click in the box and see a blue frame.  When you see that frame you can change the text in that box.  Now you can change the font, font size, and font color.  And, of course, you can change what the text says.  If you want to move the text box, click on the frame.  You’ll see the four-sided arrow and can then drag the box to a new location.  Click outside the text box when you’re finished.   You can also do a copy/paste for the text inside a box, or the entire text box.  Ctrl C will copy and Ctrl V will paste.


Editing Tables:  The core of any planner is the planning pages.  Most weekly planning pages are created with tables.  The first thing you need to decide is where you like the subjects and the days.  You can have the subjects on top and days down the side or days across the top and subjects down the side.  After you decide which style you want, delete the other slide.  (Don’t worry, you have the original version saved so you can get that page back later if you change your mind.)


Now, you’re ready to adjust the table for the number of subjects you have.  With the subjects at the top of the columns, you can add or delete columns.  If your subjects are down the side, you can add or delete rows.


The first thing I do is things in my schedule that are the same every week.  I add a column or row with recess and lunchtime.  If my specials (music, PE, and library) are the same time every day, that will be another row or column.  If my special are at different times each day, I can split a cell, or add a text box to a cell.


After you have the weekly plan page set up, you can duplicate that page for each week of the school year.  I usually duplicate it for just the weeks in the first quarter, just in case I need to make changes for the next quarter.


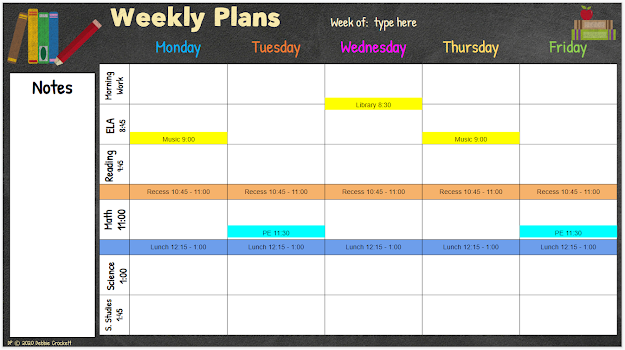
Here’s an example of a planner page set up with rows for lunch and recess.  Text boxes for music, PE, and library have been added, too.


Editing the Weekly Plan table for digital planner on Google Slides.

Here’s another trick.  If you want more room to type in your plans, you can split the plans for one week into two slides.  You’ll need to use the plan page with the days across the top.

1. Duplicate the planning slide
2. On the first slide, delete the columns for Thursday, Friday.  Or, you can choose to delete Wednesday, Thursday, Friday.
3. On the second slide delete the first two or three days of the week.

4. Now you have one week with the days split between two slides, giving you more space to write your plans.

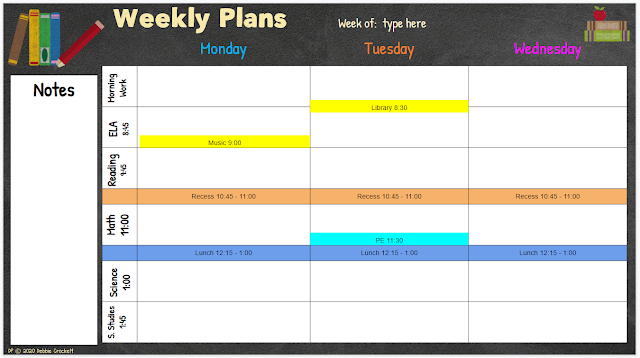
For more planning space you can split the days on your planner.

Splitting the days of the week on your planner gives you more space to type in your plans.

I hope you'll check out my digital planner.  It has dozens of pages to keep your information 

organized and your school year well planned.  Click on the image for more detail.

Digital Planners are so easy to customize.


Learn how easy it is to customize the text boxes and tables in a digital planner.


0


your photo name

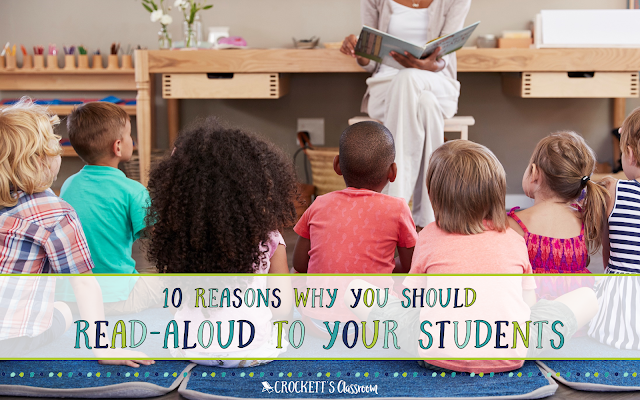
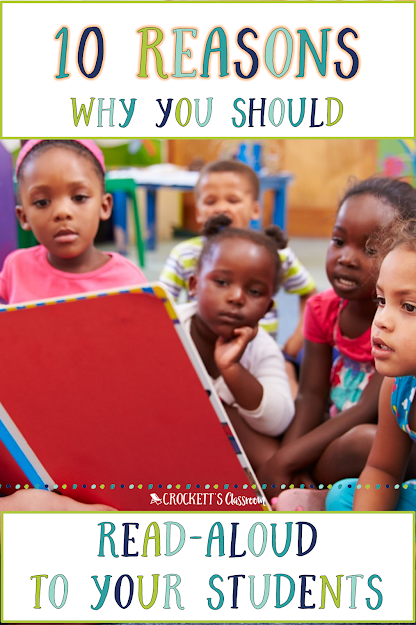
10 Reasons Why You Should Read Aloud to Your Students


Reading aloud to your students has so many benefits.  Students learn how to be better readers by listening to others read aloud to them.


Research shows that reading aloud to your child or students is the single most important activity for reading success (Bredekamp, Copple, & Neuman, 2000).   Reading aloud is the first step toward building reading comprehension skills.  That’s why I hate seeing it squeezed out of the crowded daily schedule in so many classrooms.  Before you take out your daily read-aloud, consider these benefits.


Establish a sense of community with shared experiences.  One of the goals during the first few weeks of school is to bring your students together as a community.  This can be a challenge for students who are meeting for the first time and come from different home situations.  I know of no better way to begin building a community of learners than to bring them together for a read-aloud.  Listening to a story gives your students a shared experience. You’ve just given them something they have in common.  For the rest of the year, you can say, "Remember when we read about . . . "

Build background knowledge.  Our students come from such varied backgrounds we don't always know if they have the schema, or background knowledge, to understand the topic you’re about to teach.  You can build that background knowledge with your read-aloud texts.  Not only are you giving them basic background knowledge you’ll be gaining a better understanding of your students' past experiences.  Through the discussions, you’ll be able to assess how much experience they’ve had with this topic. 

Acquire vocabulary.  Our listening vocabulary comes first.  We learn so many new words when we're listening.  When you’re reading aloud, make sure you take time to point out a few important or interesting words. You can even jot the word onto a sticky note, along with the definition, and/or sample sentence.  Stick that word on a “Words We Love” poster.  You’ll be surprised how many times your students will visit that poster and begin using the words in their discussions, or even their writing.  Your students will soon start listening for new words and offering suggestions for your “Words We Love” poster.

Advertise great books and authors.  Kids love to read the books you've read aloud to them.  They want to experience the story or characters again.  Sometimes you need to choose a book that is one of a series, or by an author who has written other books at the same level.  Try to have some of these books available for your students to check out to read on their own.

Model fluent reading.  Kids learn from role models.  As you read you'll be showing them how good readers have a good pace and their voice shows an understanding of the text.  Make sure you’re modeling fluency in both fiction and nonfiction text.  

Model thinking strategies.  Reading aloud is the best time to show students what good readers are thinking as they read. As you read each day, pick one thinking strategy.  Once in a while, pause in your reading to tell students what you’re thinking.  Tell them something you’ve figured out from the clues the author has given, or the details that helped you figure out the main idea.  It might help if you plan the think-aloud moments ahead of time. Mark the spots you want to stop and share your thinking.


Give students a chance to share their thinking.  This mini-tissue box from the dollar store and large wooden sticks are a great way to randomize the students you call on to share their thoughts.


Give students access to quality literature in a wide range of genres.  We all have our favorite genre. Sometimes students don't know that other genres even exist.  Make sure you choose read-alouds from many different genres.  You never know when you'll spark new interests in your students.

Introduce new topics, concepts in science, and social studies.  Picture books are a wonderful way to introduce new topics and concepts in the content areas.  Not only do you get to discuss the facts, events, and information, you'll see which students have strong or weak background knowledge in the area.

It’s fun!  Students connect reading to an enjoyable experience.  How many of you still remember one of your teachers reading aloud to you?  I think if you ask any adult they will tell you that the read-aloud time is one of their fondest memories from elementary school.


COVID 19 Update, July 2020

With most schools looking at beginning the school year with distance lessons, some publishers have given permission for their books to be read online.  School Library Journal has compiled a list of publishers' websites.  You need to check with each publisher to see if reading one of their books online is allowed.

Click on this image to go to this extensive list of publishers.


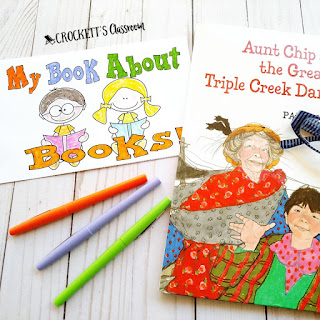
Two of my favorite books to read aloud at the beginning of the school year are by Patricia Polacco.  You can click on each image below to check out the free activities for these wonderful books.


T

When Lightning Comes in a Jar, by Patricia Polacco, is a wonderful book for the beginning of the school year.  The story about a family reunion is the perfect way to begin student stories about their families. Your students will learn about the importance of books as you read about Aunt Chip.   Aunt Chip knew there would be consequences when her town knocked down the town library.


                          Studies show that reading aloud to your students will help them become better readers.


1


your photo name

Would You Rather Daily Question


I love the first week of school because it’s a clean slate.  The room is clean and perfectly organized, the year-at-a-glance plans are written, name tags are on the desks, and your supply cabinets are filled with unbroken crayons. 


Now the butterflies in your stomach begin to flutter madly.  What do you actually do with your kids during the first week?  Getting to know your students and establishing a kind and caring community is a must for the first week of school.  I have a few ideas to share with you in the next few weeks that will help tame those butterflies.  


Daily Would You Rather Question

Here's a quick and fun way to get to know a little about your students.  You've probably heard of the game Would You Rather.  It's a set of questions that ask the player to choose between two items.  Sometimes the choices are two things you'd really want and sometimes they're things you don't want at all!


My version of the game asks kid-friendly questions.  They're meant to get kids engaged in interesting discussions as they get to know each other.


Preparing for the activity:

On the first day of school, take a headshot photo of each student.  (These photos will come in handy for many projects throughout the year.) Then digitally crop the photos so just the head and shoulders can be seen.  I like to crop them into a circle before I print them.  You can laminate them before you cut them out.  That way you can use them for other projects.  If you plan to use them on a magnetic whiteboard, you can attach a magnet to the back. 


Now you can get your display ready.  I created a set of labels you can download and print for your display.  This is a PowerPoint file, so make sure you have that program before you download it. 


Would You Rather Freebie


This file not only has the editable labels, but it also has a few Would You Rather  question cards you can use with your class.


New!  I've just added a digital version of the Would You Rather  questions.  The download has a link so you can add it to your Google Drive.  


Ready to go!

Now you’re ready for the question.  I like to use questions that help me get to know my students and lead to spirited discussions.  The questions should not have right or wrong answers.  It's okay if the kids have a hard time choosing just one response.  Making difficult choices really gets the students to join the discussions.


Have the question displayed and the two choices on the Would You Rather board.  After you introduce the question, let students place their photo on the side for their choice.


Would You Rather Daily Question Display,  Great way to get to know your students during the first week of school.

This type of question is also an excellent writing starter.  You can have students explain their choice in their writing journal.  Or, assign it as part of your homework for that week.


If you'd like to have more Would You Rather cards and other back-to-school ideas, check out this Ultimate Resource Bag.  It has 10 activities to use the first week of school to get to know your new students and begin setting the tone for a kind and caring class.


0


your photo name

Why You Should be Using Student Binders

 
Helping your students keep everything organized is so much easier with binders.  Being organized is an important life skill that needs to be taught.  Showing kids how to set up and maintain a binder isn't difficult, it just takes a little time.

Are you tired of students not being able to find that math paper you started yesterday and want to finish today?   Then you should be using student binders.  I can't say my students never lose a paper anymore, but it's pretty rare. 


In my classroom, organization is a priority.  I keep my desk and materials organized and I expect my students to keep their things organized, too. That’s why every student uses a binder to keep their papers organized. Most of the time, coming into third grade is the first time they’ve used a binder.  So, one of our first tasks is to set up our binders.  Here's how I do it.

Binder Choices
I’ve found that 1 or 1.5 inch binders are a good size.  If you go much larger, they take up too much space in the desk.  I like the binders with a clear pocket on the front so we can slide in a cover.  I'm able to order binders from our district warehouse, so every student got the exact same binder.  But you can also stock up during back-to-school sales, or put them on your class wish list.

If you have students bring in their own binders, I suggest you do not allow the Trapper Keeper binders.  These binders are set up to hold pocket folders which are actually more difficult to keep organized.  Papers need to be clipped into the three rings of a regular binder.  If they're put in folder pockets, they get wrinkled, torn, and can fall out. 

Binder dividers are the key to organizing the materials inside.  This set has a printable page.  You can print a set for every student so they all have the same tabs.

Dividers
The dividers with plastic tabs that let you slide in a label work best.  The slide in tabs come with a sheet of blank tabs that can be put through a printer to customize with the labels you want.  

These are the tabs I usually have in my binders:
--V.I.P.   Very Important Papers.  This section holds pages with the class or school information.  The papers in this section usually stay all year long.
--Subject tabs    There is a tab for each subject area; reading, language, spelling, math, science, and social studies.

The packet of dividers usually has eight dividers.  That should be plenty to set them up the way you want.

Pockets
The pockets inside the front and back cover are used for the communications sent home and then returned to school.  The front cover is labeled Home and the back pocket is labeled School.  So, anything that needs to be seen by parents is put in the front pocket.  Anything that needs to be returned to school should be placed in the back pocket.  To tell the truth, the back pocket is often ignored and all papers coming back to school are usually put in the front pocket.  I don't get too picky about that, as long as the papers get back and forth safely.


Using the Binders
Once you have everything ready, it’s time to show your students how to use the binders.  Don’t be surprised if this is the first time your kids have actually used a binder.  In fact, you will probably need to show them is how to open the rings.  The best way is to press the top and bottom openers (I don’t know the official name for those things!)   If they pull the rings apart, they will eventually become misaligned and not close properly.  

To save time I usually have the dividers already in the binders before I hand them out.  This way, I’m sure all the dividers are put in correctly so the divider with the first tab is on top.  But, I let the kids slide the labels into the tabs.  Most of them can do it, but a few will need extra help.

As they are adding the labels, explain that papers for each section go BEHIND the tab.  They must “open” the section by holding the tab and moving it from the right side to the left side of the binder.  It’s just like opening a book.  You open a book by moving the cover to the left.  For some reason, this is very confusing for some students.  During the first couple of weeks I go around and double-check that the paper I've just asked them to put away is behind the correct tab. 

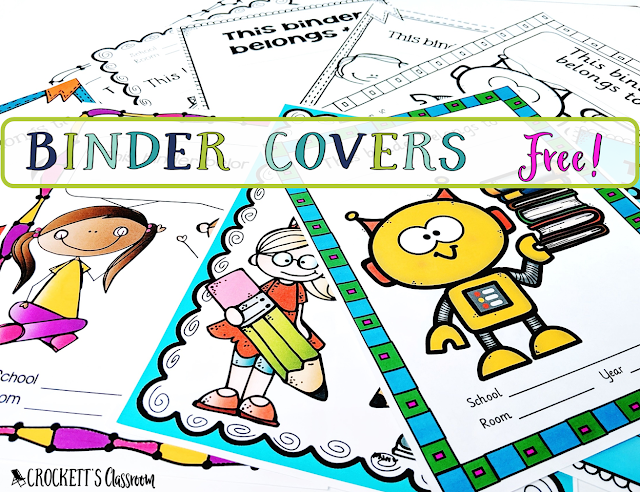
I created a set of binder covers for you!  There are five designs, both bw and color. There's also a template for printing the tab labels.  (Click on the image)

 Set of binder covers, both color and bw.
Click on the image to download this set of binder covers.  This is a PowerPoint file which is editable when it's open in PowerPoint.  (IT IS NOT EDITABLE WHEN IT OPENS IN YOUR BROWSER.)  

Daily Use
The main reason for using a binder is so students can keep important pieces of paper and find them later.  For example, If we start working on a reading assignment and don’t have time to finish, students put it in their binder and we get it out the next day.  Binders drastically cut down on crumpled, torn, or lost papers.  

Students don't keep every paper in their binder.  If we did the binder would soon be stuffed so full it wouldn't close!  My general rule is to keep ongoing work, reference pages we'll use again, and graded assignments.   Practice pages we don't need anymore go in the Home pocket and hopefully are taken out at home.  

I require that all graded papers stay in the binder until the end of the quarter.  That way, parents can see them and if there is ever a question about a grade, the assignment is right there.  It's also handy for student to look back at their work to see their progress.  

Tips:
-Make it a routine to tell students where to put papers in their binders.  If you want a math paper kept, tell them to put it in the math section of their binder.  If it's just a practice paper that doesn't need to be kept, tell them to put it in the Home pocket to be taken out that night.  Don’t assume they know where to put something.
-Check frequently to make sure students have cleaned out the home/school pockets.  You don’t want to miss any notes from parents. Some parents don't take out the class or school announcements or flyers that are meant to be kept at home.   
-Depending on my desk arrangement I had table or row captains.  One of their jobs is to check to make sure all students in their group have placed a paper in the correct place.  It saves me a lot of time.  Plus, kids love to help each other.
-If I have a student who is especially challenged with staying organized, I assign a buddy to help him/her.
-Have a thorough cleaning out and reorganizing at the end of each quarter.  I have students take out everything we don't need anymore.  The graded papers can be stapled and sent home.  This way you'll start the new quarter with a fresh binder.

Do you have any special ways to keep your student binders organized?  Share your fresh ideas. 


0


your photo name
Back to Top