Word Building, 4 Centers, 1 prep

Get more out of your literacy centers!  With just one prep you can get ready for 4 weeks of centers.


I know it might sound like a dream, but you really can get four different word building activities with just one prep.  With the demands on your time increasing, you need to find ways to save time with your prepping and preparing for learning centers.  One way is to find ways to reuse the materials from your literacy centers.  I'm going to show how you can take one set of letters and use them for four weeks in one of your literacy centers.

The letters cards can be made by you, or from a purchased set.  For three of these activities you can also use letter tiles.  I like the letter tiles from the game Banana Grams, but other letter tiles will work.  

Learn how you can use these letter tiles in a literacy center.

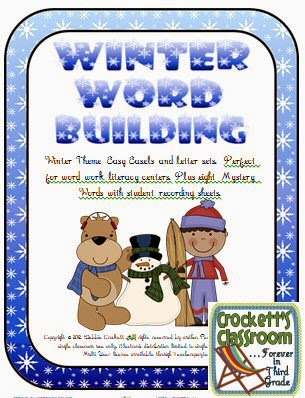
The letter cards I've used in these examples are from my Winter Word Building set.
Winter Word Building--Crockett's Classroom


Word building,this is just one of the four activities you can do with very little prep to get ready for your literacy centers.

For the first week, students can use letters you've selected to build words. The letters you choose should spell one long word. That word can be seasonal or go along with one of your current topics of study.  My example uses the letters a, e, f, k, l, n, o, s and w.  With these letters the students can make lots of 2, 3, 4, 5 and 6 letter words.  The final challenge is to see if they can figure out the mystery word made using all the letters. Click here for a free recording sheet.


For the second-week students are challenged with a word ladder. The idea is simple, but it can be quite a challenge to make it all the way to the top.

Students (or teacher) chooses a two or three letter word to write on the lowest step of the ladder.  Then they can change only one thing about the word to make a new word to move up to the next step.  They can add a letter, remove a letter, or exchange a letter. It's also allowed to rearrange the letters to form a new word. The words going up the ladder might look like this:
sit-sat-fat-at-bat-bit-bite-kite-tie-time-tame-same-came-come.

Younger students will need to use letter cards or tiles to move around as they form the words and write them on the recording sheet.  Click here to download the Word Ladder Recording sheet.
Update:  Google Slides version of Word Ladder added on Aug. 7, 2020!


During week three students get to practice their spelling skills. 

Guess My Word is a little like hangman, only it can be played with multiple players.


Each player needs a word mat and a set of letters. (extra vowel are provided)
Players place their word mat in front of themselves with the Make My Word  side facing them.  The other players will see the other side that says, Guess My Word.
Each player thinks of a word.   The word can have 2, 3, 4, 5, or 6 letters.  The players lay the letters for the word, face down in front of them, on the side of their mat that says Make My Word.  
Once everyone has their word ready, they take turns guessing a letter for an opponent's word.  The guess needs to be to a specific person for a specific letter.  (Rachel, do you have a b?) If the player has that letter he/ she turns it over and places it on the side that says Guess My Word  so all players can see it.  A turn continues until the player receives a "no" for a guessed letter.

When a letter is turned over it needs to be placed, face-up on the 
Guess My Word  side.  The letters should go in correct word order so someone looking from the other side sees the beginning letter in box 1. The numbers on the mat help players know where to put the turned over letters.

Example:  It's Kelly's turn:  "Joey, do you have an 
a?" If Joey has an in his word he turns it over and Kelly gets to ask again.  She can ask Joey again, or another player. When Kelly receives a no, her turn is over.  If Kelly thinks she knows one of the words she needs to guess each letter one at a time.  She does not say, "Is your word deal?“


Once all the letters in a player’s word have been revealed, that player gets to keep guessing the letters for the other words.


For Week Four students play a card game called "Do you have. . .? Using letter cards students try to build words.  The first student to use the agreed upon number of letters in their words is the winner.  Click here to download more detailed directions.


The great thing about this game is students get to choose what words they spell. Students who can only spell 2 or 3 letter words can play with students who easily spell 4 or 5 letter words. 

I hope your students enjoy these word and spelling games!


1


your photo name

Lesson Raffles

Spice up your lessons with Raffle Tickets!
Keep your students on their toes with lesson raffle tickets.  Give each student a ticket and have them answer a question during the lesson.  Then choose a ticket that shows good thinking!  Great motivator.

In our rush to cover objectives and meet the needs of our students, parents and administrators we often forget that kids are kids.  They need some fun in their day.  Since there isn't much “extra” time for those fun craft projects and free play time I came up with a way to build a little fun into my daily lessons.  It's called a lesson raffle.  It’s so simple and can be adapted to work in just about any lesson through out your day.

Step 1:  Present your lesson.

Step 2: Ask students a question.  This could be a question from the book, worksheet or one you write on the board.

Step 3:  Students write the answer and their name on a slip of paper or note card.
Lesson Raffle, kids answer a question or explain a math problem or science process during the lesson.  Great way to check their understanding.  Then one slip is picked as the winner for a little prize.  Great motivator!

Step 4:  Collect the responses in a basket, box, or jar.

Step 5:  Draw a slip or card from the basket.  If it has the correct answer or appropriate response, that child is the winner! Also, if the child has forgotten to write his or her name, they can't be the winner.

Sept 6:  Present the prize.  This might be a piece of candy, a sticker, or maybe the winner gets to do fewer of the practice problems on the page.

Lesson Raffle Slips, a fun and engaging way to check student understanding during a lesson-----crockettsclassroom.com


When students know their might be a raffle question during the lesson they'll stay engaged so they'll be ready to answer the question.
The best thing about this is you've collected a small sample of their work so you can look through the all of the responses as the kids are working to quickly see who "gets it" and who may need a little more help.
I love it because it’s so quick and the fun is built into the content of the lesson!

The lesson raffle is also flexible.  I can have students do one math problem from the text or answer one question from the science text.  Or I can ask them to summarize the plot of a story just read with a partner.  The possibilities of what you ask students to write on the raffle slip are endless!

Don't forget to check out all the other terrific ideas from these wonderful blogs.


0


your photo name

Using Literacy Centers Again and Again

Using Literacy Centers Again and Again

Spend less time prepping for your literacy centers by finding ways to re-purpose the materials for several different tasks.

One of the most time consuming tasks for a teacher is prepping material for the week ahead.  Many teachers have five to ten literacy centers to prepare and set up each week!  That's a lot of prep time. What if you could prepare one literacy center, make small changes and then use it for several weeks.   I'm going to take one activity, prep it and then see how many different ways students can use it in a literacy center.

I'll start with a packet from my store called Suffix Skaters, adding -ed and -ing. But any word sorting activity would work.  The packet has a sorting activity, written practice sheets and a game.


Week One:  Sorting words to add the suffix -ing.  There are 28 small word cards for the sort.  Students read the rules on the sort mat and sort the cards according to how the -ing would be added to the word.  For the first week it's a good idea for students to sort the words several times.  They can do the sort with a partner, and after a little practice they can try a timed  or speed sort. Doing multiple sorts can easily take 20 minutes.  If your center time is longer you can have them write the words with the -ing added.


Week Two:   Game Sort with -ing words. 2 to 4 students can play the game. Use the sort mat as a game spinner.  A pencil and paper clip make a quick and easy spinner.  Students spread the word cards out, face up, so every one can see them. The first player spins and then has to find a word that matches that rule.  When they find a word they say the word and spell it with the -ing added. If they spell it correctly they get to keep the word.  If they spell it incorrectly the card has to be set back with the other cards.  Continue taking turns spinning and spelling until all the words have been chosen.

Game version 2-  Pass out the cards to the players.  Player one spins.  If they have a word for that rule they spell it with the -ing added and take it out of their hand.  If they spell it incorrectly it has to stay in their hand.  The first player to empty his/her hand is the winner.


Week Three:  Sort and ABC orde.  The students should be very familiar with these words and the -ing rules.  Have them do the sort again, either with the cards or as a written sort.  Then have them take the words from each category and put them in ABC order.  If they have time, they can write them, with the -ing added in ABC order.  For more of a challenge have them put all 28 words in ABC order!

Week Four:  This week can wrap up the skill of adding -ing to words.  Students can start with the sort again and then complete any of the written practice sheets from the packet. There are 4 to choose from.  There is also a challenging page where students have to take a word with the -ing and change it back into the base word.


There you go!  One set of 28 cards, one sort mat and 5 optional practice sheets will see you through 4 weeks of literacy center prep! For the next 4 weeks you can do the same thing with the -ed cards and sort mat!

You can purchase the entire Suffix Skaters, Adding -ing and -ed from my TPT store. 
 Suffix Skaters, adding -ing and -ed, Crockett's Classroom on TPT


Or, if you'd like to try a free sample, click here to download.

 Suffix Skaters, Free Sample


0


your photo name

Fresh Fall Game

Fresh Fall Game- The Pumpkin Patch

There are so many skills that students need to practice over and over…math facts, sight words, grammar skills, etc.  One of the best ways to keep the practice fresh is with a game.
I made up this game several years ago to use in a spelling center.  But I soon saw how versatile it is and my students were soon playing it to practice all kinds of skills.


The premise is simple, players “chase” each other around the board.  The winner is the player who doesn't get “caught”.  The skill practice comes in because a player must answer a question, spell a word, read a sight word, etc. before they roll a die and move.  Click on the image to download this free game.

 Fun fall game!  Kids can use the game with any question cards, or flash cards.

1


your photo name

Reading Centers Drive Me Crazy!

If reading centers drive you crazy you need to learn how to make your reading groups and centers easier to manage.

I love the idea of reading centers---students working together, active engagement, meaningful learning tasks, time for practicing new skills, time for reviewing previous skills,  differentiating, freeing teacher to work with small groups, etc....

Too often, though, it turns into a nightmare to manage. I found myself spending way too much time making sure students were where they needed to be and doing what they should be doing.  I wasn't able to give my attention to my small group.  And then, there's the time it takes to prepare the centers every week and teach the kids what to do at each new center. 

I think the part that challenged me the most is coming up with centers that matched our curriculum and students were able to complete on their own without being just "busy work".

Throughout my years as a classroom teacher I tried so many different systems, each with some success.  But, I think what I saw in the second grade classroom of my friend, Mrs. Q, this week might have saved me a lot of headaches in my own classroom.  Mrs. Q, like every other teacher I know, is overwhelmed with the demands being placed on her this year.  The out-of-classroom demands keep increasing and this is affecting classroom instruction.  So, Mrs. Q is trying to keep it simple.

She's set up her small group/centers time in a way that will make the time valuable for the students and not take too much of her prep time.  Plus the simplicity and flexibility will allow students to manage themselves so she can give her attention to the students in her small groups.

I hope you'll find a few ideas that will help you bring some simplicity and peace to your teaching day!

Reading Groups:  

Here's a snapshot of Mrs. Q's whiteboard, where she has her groups and stations set up. (I changed the names for my sample class.)

Reading Groups and Literacy Centers, an easy way to keep kids on track while you have time to meet with small groups.
I'll try to explain how she has this organized.  There are six reading groups. Each group has 4 students, grouped by ability.  She calls reading groups when she wants to work with them.  This board does not show which group works with the teacher because she calls groups when she needs them, not by a set schedule.  She also has the flexibility to keep a group for just a few minutes or keep them longer, depending on their needs and her plans.  When she calls a group, those kids stop what they're doing and join her at the reading table with their materials.   So, through the week she will probably meet with the lower ability groups almost every day, while the higher groups will not meet with her as often.  But, one of the great things about this is the flexibility.  She can call a group to the table at any time for any reason. 

 Another benefit is she can call students from different groups at the same time if she thinks they would benefit from the same instruction.  Let's say she noticed that Mary, Amy, Jill, Brian and Mike all had trouble with contractions last week.  She can easily have a little
reteaching session with those students, even though they're from 5 different groups.

Centers:  
On the right you'll see the eight center numbers.  Students go to one center each day (Monday through Thursday).  Friday is a "catch-up" day.   So on this day, Joe, Mary and Debbie are scheduled for center #4.  When they finish their seatwork (skill practice sheets) they can go to their center.  If they finish their center they get a book to read or write in their journal. 

Since, working with the teacher at the reading table takes precedence over everything else, some students may not have time to complete their center for that day.  That's what Catch-Up Fridays are for!  On Friday they can go back to any of their centers from that week to finish their task.

I spent a little time with Mrs. Q this week to help her prepare materials for the center activities she'll use during the 2nd Quarter. Since the students work through 4 centers a week, the eight centers will last for 2 weeks.  We chose some activities because of they can be used more than once by the students.  So, her center planning and prep is almost finished for the entire quarter!

I've made some labels you can use to set up your own reading groups and centers.  Click on the image to download them for your own classroom.
 Reading Groups and Centers, Editable display labels, free!


My next few blog posts will focus on choosing literacy centers that are flexible, engaging and match your curriculum.  So make sure you're following Crockett's Classroom!

0


your photo name

Autumn Word Building Activty

Making Words has always been one of my favorite spelling/word work activities.  The idea is so simple, yet adaptable to be used at almost any grade level.  I think I purchased the first book way back in 1995. 

I then added Making More Words and Making Big Words to my professional library.  


All of these books, by Pat Cunningham, can still be found in bookstores and online.  If you haven’t tried these books you should definitely check them out.


Taking Pat’s simple idea of using a set of letters to make words, I’ve designed a set of letters for autumn. 

They are so much fun to get your kids excited about spelling patterns.  You can use the letters for guided class lessons or set them up in a center so kids can explore spelling seasonal words.


This beginning set has one set of letters on turkey feathers and a stand up easel you can make for each student. (You don’t have to use the easel for the word practice, but they’re really cute!)


To get your free set, along with directions, click on this image.
Building Autumn Words Freebie---Crockett's Classroom

Find more wonderful freebies at Manic Monday at Classroom Freebies.
 Manic Monday at Classroom Freebies


1


your photo name

Anchor Student Learning Part 2


More Interactive Anchor Charts
It's time to put those great anchor charts you've been creating to use!  I've been reading a wonderful book called Chart Sense by Rozlyn Linder.  She has so many ideas for anchor charts and how to use them when teaching informational and literary text.  You really need to check it out.
 Chart Sense---Amazon

Hook your student with anchor charts. I use push pins for my "hooks" because they're simple and I always have them on hand.

The hooks can hold so many things:
-rings of vocabulary cards or math facts
-baggies with writing prompts or response prompts
-clips with task cards


In my sample I have sets of subjects and predicates.  They can be used to create some silly sentences.  This is a fun whole class activity after you introduce the concept.  Mix up the cards and hand them out to students.  Students can mingle to find a partner who has a sentence part that will go with their part. Students with subject cards find a student with a predicate card.  Then they both write the complete sentence on their recording sheet.The sentence may be a little silly, but it must make sense.
 Subject/Predicate Match Up--Crockett's Classroom

For the introductory activity you may want to print the subject cards on blue paper and the predicate cards on pink or red paper to match the anchor chart.  For more of a challenge, print all of the cards on white paper and students will first have to identify if they are holding a subject or predicate before they find a matching part.


You can download the subject/predicate cards and recording sheet here.   Silly Sentences with Subjects and Predicates---Crockett's Classroom.

Since it's a pdf file you can print the first page as a poster (like I did) for your class display.  Or you can hand draw the chart and add your personal touches.

Enjoy!


Find more great ideas at Manic Monday Link Up.
 Crockett's Classroom linked up to Manic Monday at Classroom Frfeebies


3


your photo name

Making Time for Science and Social Studies Lessons

Science and Social Studies in Grades K-3-- Who has time?!
How do you get science and social studies lessons into your day.  Sometimes our schedules are so full it's hard to find time for these important content areas.

Students in grades K-3 are learning how to be learners.  I believe their day should focus on the “3 R’s”.  So what do you do with the science and social studies objectives you’re required to cover?  You can do it all, but you need to think of science and social studies differently than an upper elementary teacher.
With more and more emphasis on informational text you have the perfect way to bring these content areas into your reading, writing and math lessons.  Many of your science and social studies lessons can even take place during your ELA and Math blocks of time.
Here are a few ways you can bring the content areas into your reading and writing instruction.

Use your science and social studies textbooks during your reading lessons. Students in the lower grades (and upper grades, too) need to learn how to use this type of book.  Your mini-lessons could include;

*How to use the book, table of contents, glossary, index.  Give them lots of topics to look up.  Write a few questions with answers that can be found in you science or social studies text.  Then have students sort them according to which book part would help them the most; Table of Contents, Glossary, or Index

*Using Text Features, bold print, special fonts, headings, subheadings, captions, graphs, tables, charts, illustrations, diagrams, timelines, etc.  Have book scavenger hunts to find these different features and spend time talking about how they add information that may not be in the regular text.

*Explore text structures, informational text is usually organized in a special way; main idea/details, question/answer, cause/effect, etc.  Find examples of each type of structure and practice pulling out important facts and writing it on a graphic organizer.


*Use interactive notebooks and graphic organizers;  Graphic organizers not only help students see the text structure they help students recognize and organize important information.  After a graphic organizer is completed you can use that information to write summaries, mini-books, or other short displays or presentations.   

*Merge with Math;   I don’t know all the standards used by other states, or around the rest of the world, but I would guess they include collecting and interpreting data and using measurement.   Science and social studies activities will give your students wonderful opportunities for hands on experiences in these areas.  The scientific method is all about making estimates, and then collecting measureable data.  In social studies, events from history can be placed on a timeline, changes over time can be placed on a graph to be compared.

Think Projects!  Kids love anything that’s called a project.  The word just sounds fun!  But, projects are also a fantastic way to bring reading, writing, math, science and social studies together.  The project could include a little bit of research (reading, note taking, writing), a written piece (writing), taking a survey or collecting data (math) and creating something that demonstrates the students’ learning.  And don’t forget the creative and artistic talents that come out during projects.
I think the secret to finding time to teach science and social studies is that there is no additional time in your day.  Don’t cut your reading, writing and math time short to squeeze in science and social studies lessons.  Instead, find ways to cover that content in your ELA and Math blocks of time.  I believe it will make all you lessons more meaningful and fun for kids.  


I think the secret to finding time to teach science and social studies is that there is no additional time in your day.  Don’t cut your reading, writing and math time short to squeeze in science and social studies lessons.  Instead, find ways to cover that content in your ELA and Math blocks of time.  I believe it will make all you lessons more meaningful and fun for kids.   

Here are some materials from Crockett's classroom that might help you incorporate science and social studies into reading, writing, language and math.


2nd and 3rd grade Math and Informative Writing project, Wi Interactive Notebook, Third Grade---Crockett's Classroom Reference Sources---Crockett's Classroom


3


your photo name

Meet and Mingle Friendship Bracelets

Thrifty Thursday:  New Year, New Class and New Friends!


Today’s Thrifty Thursday is all about friends.  At the start of each new school year kids are making new friends.  One activity I love has the kids mingling, talking and meeting new friends.  Along the way they are collecting beads on a pipe cleaner that will be made into a friendship bracelet.  Super simple, but oh so fun!  It's a way for shy students to mix and mingle in a structured way. 
  

From the dollar store you'll need a couple of packs of pony beads and pipe cleaners and snack size zip baggies.  The bag I found has 250 beads will be enough for about 10 students.  The pipe cleaners came in a package of 20.

First---count out pony beads, each student will need one bead for each person in class.  You can include yourself.  So, if you have 23 students you'll need to put 24 beads in each baggie.  

Second--- copy the Class Friends Question sheet.  The sheet has 5 questions. There are also a few extra lines so you can add your own questions.  Click on the image to download a free copy.
 Meet and Mingle New Friends


Third---Explain to your students that they will be meeting new friends today.  As they meet a friend they ask one of the questions from their Meet and Mingle page.  After they finish talking to their new friend they write the friend's name next to the question so they'll have a record of all their friends' names. 

Fourth---Before they move on to mingle and meet another friend they exchange beads.  These beads are added to their pipe cleaner.

When they're finished they should have the name of every classmate on their sheet and their bead baggie should be empty.

Finally--- Students twist the ends of the pipe cleaner to form the bracelet.  The bracelet should be large enough to slip over their wrist, but not too large that it falls off too easily. 


2


your photo name
Back to Top