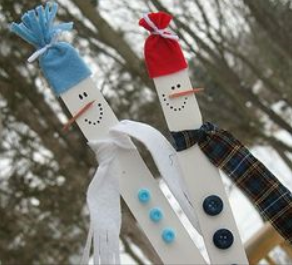
Snow Window Snowman

Snow Window Snowman


Materials:  snowman pattern copied on heavy white paper.  Clear piece of cellophane,  plastic snow pieces or glitter. You’ll also need a scrap of fabric for the scarf and small piece of orange paper for nose.  Optional:  googly eyes,
1.You can copy the snowman pieces on card stock for each student or make templates out of lightweight cardboard and let students trace and cut them out. I usually had one template for every 4 students to share.  You can use the templates for many years.
2.Cut the center out of the front snowman.  Glue the clear cellophane  around the circle.  (Make sure the side with the black lines is on the inside so they don’t show when you’re finished.
3.Students can draw face features or use scraps of paper to cut out nose and eyes.
4.Lay the front snowman piece face down on the table,
       put glue around the edges and place the snow pieces
       on the cellophane.  Then put another line of glue around
       the  circle opening.  This will keep the snow pieces in the
       window area.
5.Let the glue dry for 10-15 minutes.  Then you can add the scarf and  a ribbon at the top if you want a hanging ornament.

0


your photo name

Stained Glass Tree


Stained Glass Tree


This sun catching tree is super simple to make.  Copy the pattern on green construction paper.  (The picture makes the tree look black, but it is actually green) Cut out the center.  Have lots of ½” strips of black construction paper ready.  Students glue the black strips to the back of the tree, crisscrossing to form different sections.  Caution them to not have any spaces that are too small.  Then cut tissue paper to fill the spaces.  If you want, another green tree shape can be glued to the back to cover the paper ends.


0


your photo name

Most Wonderful Time of the Year!


The season we’ve waited for all year is almost here!  Thanksgiving is just a warm up for the big event in December.  My birthday!  (just kidding) Even though my birthday is December 24, it doesn’t compare to the excitement of Christmas.

The weeks leading up to the holidays can be some of the most precious time you spend with your students.  Over the years I’ve read lots of holiday books, cut out thousands of stars and used gallons of glue and glitter.  I’d like to share a few of my favorite books and craft activities and maybe you’ll find a few new ideas to share with your kids (at school or at home).
I plan on adding a new idea every other day until December 23th.  So check back often to download all the holiday ideas.
Pattern and directions for making these standing reindeer.

The first craft is a standing reindeer.  I found a picture of these adorable reindeer in a magazine about 10 years ago.  I drew the pattern and my students have loved making the pair of reindeer every year since.  I scanned my pattern for you to download.  I'm not a clip artist so the pattern is kind of rough, but should work fine when you make copies for your students.


Copy the pattern on brown paper, or on white paper for the kids to color. Fold in the middle, then glue the sides together.  Clip on two clothes pins for the legs.  Then you can add pipe cleaner antlers, googly eyes, pipe cleaner wreath, a string with a bell, ribbon bows or any other adornments you can think of. My class reindeer turned out different every year.  It all depended on what scraps of materials I had on hand.  Have fun with you class reindeer herd!

Click here for directions and pattern.


0


your photo name

Snowman Ideas


An Avalanche of Snowman Ideas

  Brrr!  Its cold outside.  Well, not really.  Here in the deserts of Arizona we like to pretend it's cold outside.  One way we get in the winter spirit is to bring some fun "frosty" activities into your classroom.

Who doesn't love snowmen!  I grew up in the Midwest and remember spending the day outside building a snowman and then clomp, clomp, clomping back into the kitchen where my mom would pour me a cup of hot chocolate.


Since my students can't build snowmen outside, we do it in our classroom.  My favorite is the snowman fence.

  1. Get a free paint stick for every student from your local home store.

  2. Students paint the sticks white.

  3. They can use markers for the eyes, nose and mouth.

  4. Cut off the finger tip from a knit glove (I buy the really cheap ones from Walmart or Walgreens) This will be the knit hat. Top off the hat by gluing a small pom pom at the top.

  5. For the scarf cut strips from any scrap material. Glue a few colorful buttons down the front.

  6. The snowmen are adorable on their own but I taped them to two long board (painted white) and then set them in my window. I love them so much I didn't let the kids take them home until the end of February!


Check out these snowman crafting ideas on my Pinterest board.

http://www.pinterest.com/dsrtdeb/let-it-snow/

http://www.pinterest.com/dsrtdeb/let-it-snow/


Love these crystal snowflakes.  They’re super easy and looked so sparkly hanging in front of our windows.

They’re super easy and looked so sparkly hanging in front of our windows.

For the crystal snowflakes you’ll need:

pipe cleaners, 5 for each student, 3 long pieces and 2 cut into smaller pieces

string

pencil

wide-mouth jar, one for each student

Borax

boiling water 

Steps

1.  Twist three pipe cleaners in the center to form the six sides of the snowflake.  Cut (with wire cutters) three pipe cleaners in half.  Twist each of these smaller pieces around the end of the original six sides.  This adds a little more dimension to the snowflake.  Tie a string around one end of the snowflake and one around the pencil.  Hang it down into the jar to test the length.

2.  Add boiling water to the jar.  Let students stir in about 3 tablespoons of borax.  Let then stir very gently until the borax is dissolved.  You may need to add more borax.  The ration is about 3 T borax for every cup of water.

3.  Now hang the snowflake in the jar.  Let it cool overnight.  The next morning you should have beautiful crystals on the snowflake.  If the crystal didn’t form you probably didn’t have enough borax in the water.


Need a fun writing idea?  Try this creative snowman writing prompt.

https://docs.google.com/file/d/0B_TeTuAvino-NldXc1BTdmtZeGs/edit


0


your photo name

Read Aloud Discussions


One way to make your read-aloud time more efficient is to focus your discussions on current skills, strategies or content. It's like killing two birds with one stone.  Your kids get to enjoy a wonderful book and you get to pull in some instructional time.

Start by planning how you'll use your read-aloud time.  This planning sheet will help.


Begin by writing the date and the page in the text where you'll begin.  I usually don't put an ending page because I'm never sure how far I'll get in the book.  It will depend on the discussions we have that day.  At the end of the read-aloud I'll write the beginning page for the next day.

On the planning sheet you can circle if the lesson focus will be a strategy, comprehension, content information or other.  Then any materials you might need. This might include chart paper, reading notebooks, chat cards, name sticks, partner list, etc.  There is also room for notes to jot down any reminders you want to give yourself.  Perhaps you want to note the pages where you'll stop for the discussions.  I also suggest you place sticky notes in the book to mark places you'll stop for instruction and/or student discussions.

One way to get students involved in discussions about the book is to use Reading Chat Cards.  These cards have a thinking stem students can use to begin a talk with a partner during your read-aloud time.  You can tell them which card to use (they're numbered) or let them choose one for their partner chat. 

When students are first learning how to focus on their thinking (metacognition) I let them hold their ring of chat cards.  When they want to add a thought to the discussion they hold up the card they want to share and we listen to their thoughts.  Other students can join in and share their thoughts about that topic.  They all want to share and this is one way to get them to focus and also "branch out" with their thinking a little.  It helps cut down on the "I have a dog." remarks.

Click on the image for a free sample set of Chat Cards you can use with your class. Cards 1a-16a can be used with literary texts and 1b-16b can be used with informational texts. 
 Reading Chat Cards---Free Sample


I hope these resources help you incorporate read-aloud texts into your instructional day.


0


your photo name
Back to Top