Winter Fun with Winter Books

Let it Snow!
One of the reasons I live in the Arizona desert is the snow-free winters. I don’t hate snow, I just don’t want to live with it. But these snow-free winters mean a lot of our students have never seen snow and that’s a shame because the snow can be a lot of fun. 

So…. I use books to bring the fun of snow into the classroom without living in the cold and mess!  

Snowy days ahead!  Let your kids experience the cold winter days with fun and engaging books about snow.  You can also download a free activity!

Thomas’ Snowsuit by Robert Munsch, Very funny book about the difficulties of putting on a snowsuit.  (You can listen to the author the book aloud on his website!)

The Story of Snow by Mark Cassino. This link will take you to a free teacher's guide!

Snow by Cynthia Rylant,  a young girl enjoys a day in the snow. this link will take you to a brief activity guide for the book.
Snow Day by Lester Laminack, This delightful story puts a twist on "Snow Day."

A Perfect Day by Carin Berger, This book paints a picture of a perfect day in the snow.

Snowballs by Lois Ehlert In this beautiful books students will enjoy the collages used to make the pictures.  The link goes lesson ideas for this book.

Over and Under the Snow by Kate Messner, A wonderful informational text about life over and under the snow. The link will take you to lesson ideas.

Blizzard by John Rocco This book is based on true experiences by the author.  The link will take you to a book trailer.  

The Missing Mitten Mystery bySteven Kellogg, After a day of playing in the snow a little girl discovers one of her mittens is missing!  Where could it be?  The link goes to a site with free lesson ideas.

Polar Bears by Gail Gibbons Another wonderful book filled with interesting facts about these giants of the north.

Owl Moon by Jane Yolen In this nighttime adventure a girl and her father go searching for owls on a moonlit winter night. The link takes you to lesson plan suggestions.

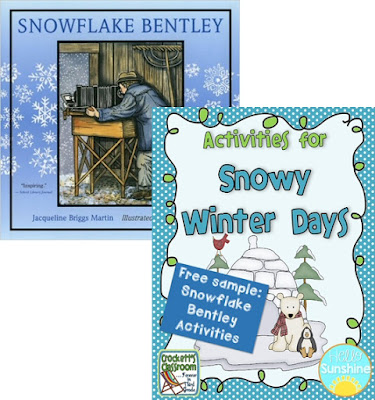
Snowflake Bentley by Jacqueline Brigg,  (the link takes you to Snowflake Bentley's official website)  I saved my favorite book for last.  This beautiful book was introduced to me by a good friend who lives in Vermont.  One year she sent me the book along with a snowflake print from Bentley's collection as a Christmas gift.  I instantly fell in love with the book and used it in my classroom every year.  
You can download a free activity to go along with this very special book.

Check out this free activity that goes along with a wonderful book about Snowflake Bentley.

0


your photo name

Simplifying Classroom Jobs

Classroom jobs, how to keep them simple, yet effective.  We want our students to have responsibilities in our classroom, but when we end up giving hundreds of reminders it becomes too much to manage.  Learn about a simple way to keep your classroom jobs effective.

Most teachers would agree that classroom jobs are important. The challenge is how to make the jobs meaningful and how to get students to take responsibility for them.

Throughout my years as a classroom teacher, I tried so many different systems.  Some were okay, but most of them ended up being more of a chore for me.  I got so tired of giving reminders to students about their job.  Much of the time, students had jobs in name only.  I ended up doing all the work myself.


As with most things, the simpler, the better.  A good friend of mine has one of the best job systems I’ve ever seen.  It’s simple and the kids really do their jobs!  The system has four class jobs; Teacher Assistant, Classroom Clerk, Public Relations, and Health & Safety.  Each job has several responsibilities.  

Classroom jobs, how to keep them simple, yet effective.  We want our students to have responsibilities in our classroom, but when we end up giving hundreds of reminders it becomes too much to manage.  Learn about a simple way to keep your classroom jobs effective.

Now, here's how this system is unique and effective.  Each week there are two people assigned to the job.  One is the Expert and the other is the Apprentice.  The Expert is in their second week of having that job and the Apprentice is new that week.  The teacher doesn't have to train the students for their new jobs every week, that's up to the Expert!  The Expert is responsible for making sure the job responsibilities are completed as well as training the Apprentice.  The next week the Apprentice moves up to be the Expert and a new Apprentice is assigned to the job. With two students responsible for the job, things get done!

Classroom jobs, how to keep them simple, yet effective.  We want our students to have responsibilities in our classroom, but when we end up giving hundreds of reminders it becomes too much to manage.  Learn about a simple way to keep your classroom jobs effective.

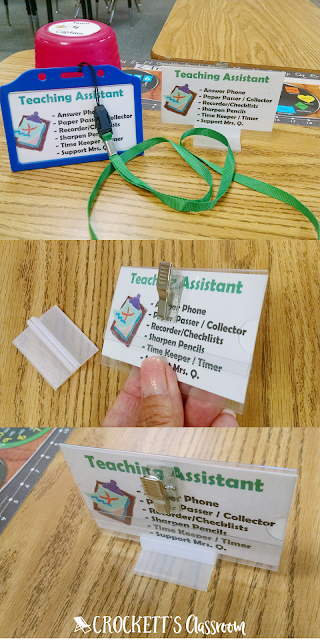
She also has a fun way to give recognition to the eight job holders for the week.  The expert gets the lanyard with the job description and the apprentice gets the name tag that also fits into a little holder that can be placed on top of his/her desk.

You can download an editable version of these job cards here. (Just click on the image.)

Classroom jobs, how to keep them simple, yet effective.  We want our students to have responsibilities in our classroom, but when we end up giving hundreds of reminders it becomes too much to manage.  Learn about a simple way to keep your classroom jobs effective.


0


your photo name

Tips for Using Informational Text

Informational Text, tips for using it in your daily lessons.

We all know that informational text is playing a bigger role in our reading instruction.  Teachers are also aware that their instructional day is packed and that the content areas of science and social studies often gets squeezed out.  I've gathered some tips to help you use your science and social studies texts and curriculum to teach the required reading skills. Stop thinking of the content areas as a separate part of your day, bring them into your ELA block.

1.  Show students the difference between literary and informational text structure.  
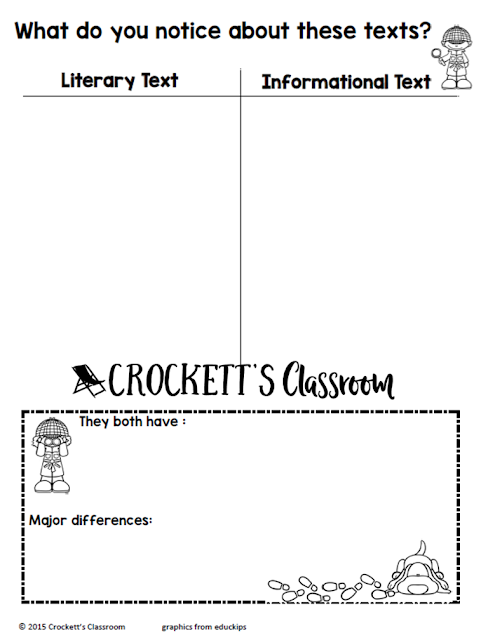
     One of the first things students need to understand is the structural difference between literary and informational text.  Literary text will generally have characters, a setting and a plot that has a beginning, middle and end. While informational text will usually be organized by topic with sections having main ideas and details. To help students compare these two types of texts you can use a T-Chart along with sample texts.  Set the students up in small groups.  Give each group a few text samples and a T-Chart.  Let them explore the text and make note of what they see.  You can sum up the activity by having them list things the texts have in common and some of the major differences they noticed.  Make sure you have a list of the main points you want to make with this activity.  Depending on the age of the students you can guide the summing up discussions to make sure all the main points are covered. 
Click on the image to download the organizer.

 Informational Text T Chart to compare literary and informational text.

2.  Teach students how to find information using the table of contents and index.
     I think the two most important features of an informational book are the table of contents and the index.  As students begin to use informational texts for research projects they will not always be reading the entire book from beginning to end.  They will use the table of contents and the index to find the specific places in the book that has the information they need.
     A fun way to give students practice in using these features is to have a scavenger hunt.  Choose an informational text for which you have enough copies for each student or each pair of students.  I always did this activity with our Science and Social Studies texts because we had a class set.   Write a set of questions that can be answered from the text.  Make sure some of the questions require the table of contents and some require the index in order to find the answer. I also leave a space to write the page number where they found the answer and if they used the table of contents or the index.

3.  Use graphic organizers to gather information.
     Graphic organizers are a must for gathering and organizing information.  There are many different types of graphic organizers that can be used, depending on the text structure and the type of information to be organized. This handy chart will give you an idea of which organizer to use with your students. 
Click on the image to download the chart and 3 free organizers.
 Download your 3 free graphic organizers to use with informational text.

4.  Choose reading strategies and or skills that fit the text.
     Throughout the year students will be learning many different strategies and skills as they become better readers.  You’ll want to choose just one or two to use with this lesson with informational text.  When you’re planning, read the text with fresh eyes and think about the skills and strategies you’re using as a reader.  Mark places where you used specific skills or strategies. When you finish, go over your notes and decide which skills/strategies fit the text and also fit the needs of your students. Then you’re ready to plan you lesson!

5.  Reread the text to teach different comprehension skills.
     Now that you have your first lesson planned, use the text again to target a different skill or strategy.  On the first day you may cover main idea and details with a graphic organizer.  On the second day the focus may be cutting down the details to just the most important ideas and writing a summary.  Later in the week you might focus on vocabulary or author’s word choice. Reading the same text again and again is always a good thing!


Kids love learning about things in their world.  I hope these tips will help you begin using more informational texts in your ELA lessons.


Find out how you can use informational text in your daily reading lessons.

0


your photo name

The More you Read . . .

the better reader you become. The better reader you become, the more you read!


It just makes sense that to become a better reader you have to read.  I used to tell my students that pro basketball, baseball or football players got there by practicing!  They dribbled, batted, passed, ran, jumped and practiced shooting the ball into the hoop for hours and hours in order to become the best player they could be.  To be a better reader, writer or mathematician is the very same, you have to practice. (Click on the image to download the free sign.)
 The More You Read poster


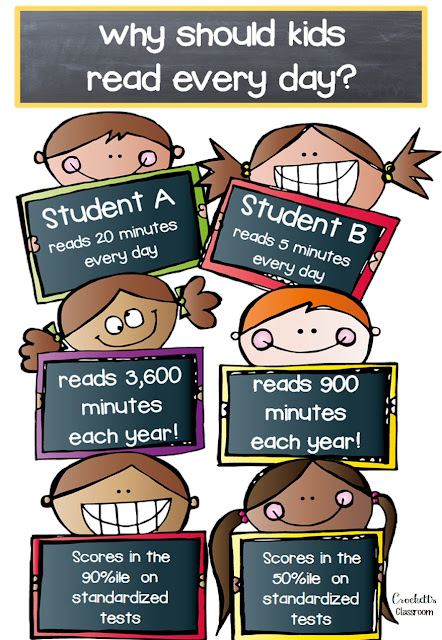
I found this chart on Mrs. London's Free Resources that very clearly shows how reading more often leads to increased test scores.


I know the school day is very busy, but you should try to squeeze in as much time as possible for students to read.  In my classroom, if students had any extra time they were to get out a book to read. There weren't any other little time filler activities, they just got out their book and read.

Here are some tips for getting your students to read more:

1.  Make sure they have access to books at their level.  Set up your classroom library so they can easily find good-fit books.  Teach them how to find those books.  You can show them the 5 finger test. Choose a page from the middle of the book, read it.  Count one finger for each word not known or not able to read.  If you get to five fingers then this book may not be a good fit.
2.   Make finding a good-fit book part of your morning routine.  Each student should have 2 or 3 books at their desk, ready to read.  I liked giving my students a Book Baggie.  They kept at least 3 books in it at all times.  When one book was finished it was taken out and another was put in.  This Book Baggie went home every night and was returned the next morning.


3.  Make reading the one and only choice of what to do when an assignment is finished.
4.  Schedule a relax and read time after recess or lunch.  Kids can get their water bottle and find a place around the room to relax and enjoy their book.  In order to maximize the time, set a timer.  When the timer goes off, if everyone is in their spot and reading, the class earns a point toward a Friday reward.
5.  Connect independent reading to your reading lessons.  One way to help connect your reading lessons to the independent or read-to-self time is to use Thinkmarks.  Thinkmarks are small bookmarks students keep in their book to remind them of a recent skill or strategy taught during a lesson.  The Thinkmark may even have a place for students to stop and jot down notes as they read.  
 Click on the image to download a free sample of the Thinkmarks from Crockett's Classroom.
 Reading Thinkmarks ---free sample.  Great way to hold kids accountable and have them show their thinking as they read.


0


your photo name

Keeping it Positive

"Sticks and stones may break my bones,
but words can never hurt me."

Of course you’ve heard this saying and may have even used it to try and comfort a child who  just had unkind words hurled at them.  But I say it’s untrue.  Words do hurt.  Even as adults, we’ve heard things that hurt and sting for a long time. To a child even the smallest insult can have a larger impact.

During the first week of school. teachers spend a lot of time teaching procedures.  They also explain the behavior expectations and the classroom management system for the year. One activity you should add to your first week is this simple activity that shows the lasting effect of unkind words and actions.
1.      Begin by asking the kids what unkind words they've heard other kids say.  Write these words on some of the Sticks 'n' Stones slips. You'll need them later on in the activity.
2.    Now give each student a piece of paper with a blank human figure on it.  Ask them student to color the figure to look like themselves. As you wonder around the room make lots of positive comments about their work.  You want the students to be super proud of their figures. After they finish coloring the figures, students should cut out the figures and write their name on the back.


3.    Have students sit in a circle with their finished figure, a pencil and crayons. Tell students to pass the cutouts to the person on their right.  Read one of the Sticks 'n' Stones cards and tell students that those words hurt. Ask the student holding the figure they received to make a tiny tear in one of the legs.  Make sure it’s small.  (You might hear a few gasps when they see their figure being torn.)
4.    Pass the figures to the right again and read another Sticks 'n' Stones card.  This time ask students to use a crayon and draw a dark zig-zag line across the center of the body. (make sure the color they use shows up on the figure.)  
5.    Pass the figures again and read a Sticks 'n' Stones card. This time have them draw an X on the face with their pencil.
 6.   You can continue passing the figures as many times as you want, reading the Sticks 'n' Stones cards and adding other tears and marks to the figures.  I usually had the students do 5 or 6 things.
7.    On the final rotation read a Sticks 'n' Stones card and have students crumple the figures into a small ball. Collect the crumpled figures.
8.  Students now return to their desks as you gently uncrumple the figures and give them back to the owners.  When the students have their own figure they can try to repair themselves by flattening, smoothing, erasing, or taping.  They'll notice that no matter how much they flatten, smooth, erase or tape their figure the damage can still be seen. 

Now is when you can talk about the effects of unkind words and hurt feelings.  Once words are heard or read, some part of them remain in our memories and continue to hurt. The figures will make a great display about using kind words.

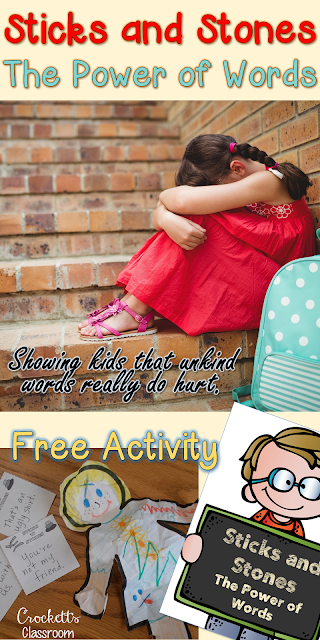
 Sticks and Stones,  words really do hurt. This activity will show your students the damage even the smallest words can do to someone else.

Click on this graphic to download printable for this activity and to receive a free sample of my Positive Behavior Tool Box (SPARKLE).
0


your photo name

Help your students see with their Mind's Eye

Our world is very visual. We see pictures and images on TV, in social media, web sites, music videos, magazines and print ads in every store window. But, students read a lot of the text that does not have images. For a deeper understand of the text it’s important for students to learn how to form these mental images.
One strategy that is great for teaching students how to form these mental images is called Mind’s Eye.  It’s so simple to implement and is a terrific way to begin a reading lesson.

One strategy that is great for teaching students how to form these mental images is called Mind’s Eye.  It’s so simple to implement and is a terrific way to begin a reading lesson.

The first step is to choose 15 to 30 key words from the story or article.  The words need to represent some of the key ideas from the story.


For example, if I was introducing the book Because of Winn Dixie, I might choose these words:

grocery store, manager, red-faced, tomatoes, green peppers, ugly dog, skidding, mess, smile, mistake, summer, preacher, trailer park, manners, found, stay, home, friends.

Read each word to your class and ask them to make a picture in their mind.  As you continue to read, encourage them to change this mental image.  It will be almost like a movie is playing in their head.

When you finish reading the word list give students time to process their mental images.  Here are a few ways they can continue to think about the images they've formed in their mind:
1.  draw a picture of their mental images. Let them share and talk about their drawings with their group.
2.  You can also ask them write a question they hope will be answered as they read the first few chapters. 
3.  Write predictions about what might happen in the book.
4.  Describe the feelings they experienced as the words were being read.  
Here is a free download to help you plan and implement this pre-reading strategy in your classroom.

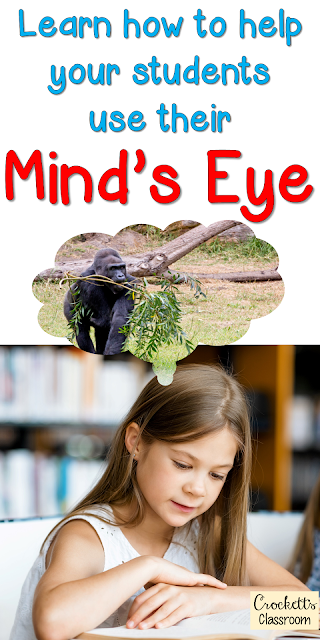
 Mind's Eye, pre-reading strategy for students of all ages.  Great way to get students to form mental images before, during and after they read.


0


your photo name

I've finally found the best teacher planner ever!

You can stop searching for the best teacher binder/planner.  This is the one you've been looking for!
This is it!  The best teacher planner/binder ever!  Everything you need to keep your teaching life totally organized.

This product has just about everything a teacher needs to keep in a planner or binder.  And, if you don't see the pages you need, let me know.  I'm always looking for ways to make this product even better.

Here's what's included in this binder/planner bundle zip file.

As you can see, all but one of the files is PowerPoint.  That means they are almost all editable!

Binder Decor Editable,  includes: binder covers, binder spine labels and divider pages with 25 design choices!
C C Standards checklists Editable:  checklists for grades K-8 with all standards.  Great for tracking student progress through the year.
Calendars:  This is a pdf file, so it cannot be edited.  PDF file, Up-to-date yearly and monthly calendars.
Newsletter forms Editable:  Keep your parents informed with these newsletter formats, 20 templates, 10 with graphics, 10 without graphics.
Planning Long Range Editable:  Make plans for the year, quarter, trimester and month.
Planning Short Range Editable:  Make plans for the week, also small group planning and planning for individual subjects.
Record Keeping Editable: pages to keep your assignments, grades, and student progress data organized.
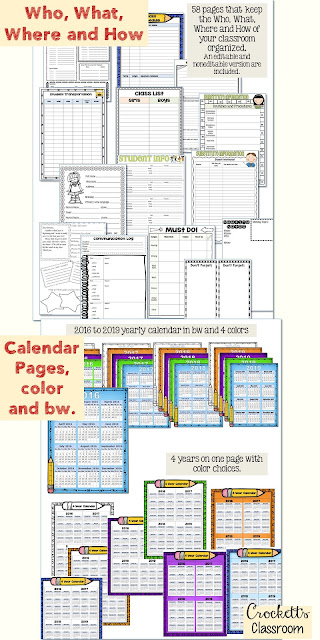
Who, What, When, Where and How :  Two PowerPoint files, one is editable and one is non-editable. Everything you need to keep all the bits and pieces of being a teacher organized. (teacher, student, parent, class information) Also includes pages for substitutes.  The non-editable pages can be used if you like to write in the information instead of type it in.

In the spring of 2016 I completely updated my Organized Teacher Binder.  I updated the graphics, added new pages and organized everything into folders instead of one long file.  One teacher she liked the pages in one file because it was easier to print at one time.  So I took that suggestion and created the totally new Print and Bind Planner. I love the way it came out and I think you'll love it, too. (I really do love teacher input and suggestions!) 

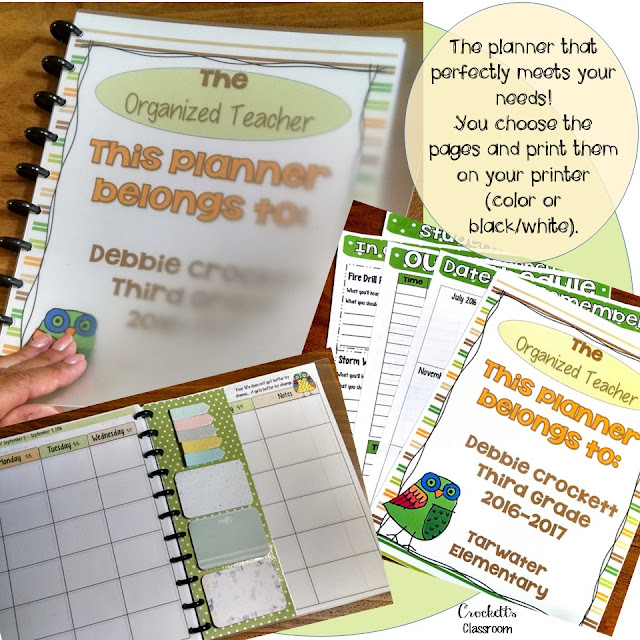
Print and Bind Planner 2016-2017:  265 pages you can customize and print as one file to create the perfect planner. So much flexibility! You can delete pages, edit the text boxes, change the font, rearrange the pages, duplicate pages, add you own pages, and add graphics. Since this is a PowerPoint file you have so much control of the content. 


This is it!  The best teacher planner/binder ever!  Everything you need to keep your teaching life totally organized.

This is it!  The best teacher planner/binder ever!  Everything you need to keep your teaching life totally organized.

This is it!  The best teacher planner/binder ever!  Everything you need to keep your teaching life totally organized.
0


your photo name

Teacher Planner, My New Obsession!

This could possibly be the best teacher planner ever!  You choose the pages you need.  Perfect for organizing your plans, progress monitoring, grades, and everything else for your classroom!


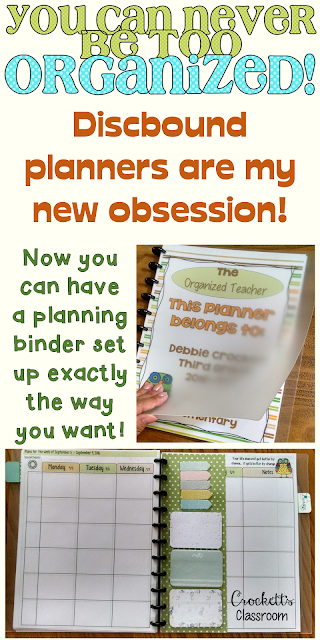
I may be a little late to the planner obsessions, but now I'm hooked! I've always loved putting together my teacher binder at the beginning of the school year and a three-ring binders was my organization tool of choice.  I loved how easy it was to arrange everything and add or remove pages.  I saw other teachers with pre-made planners and thought they looked very nice, but I didn't like the idea of someone else choosing what I put in the planner.  But now, I've found the perfect combination of binder and planner . . . the discbound planner system. I love, love, love them!  
Discbound teacher planner, my new obsession!  I love setting it up just exactly the way I want!

There are several different brands.  Two of the easiest to find in local stores are from Staples (Arc system) and Office Depot (TUL). 
If you're not familiar with the discbound system, here's a great video introduction. 


I started my first discbound planner with a letter size, frosted cover planner from Staples.  I also bought the small page punch, which is needed to punch the holes for the pages you want to add.  There are so many accessories you can buy, but I wanted to start simple and grow.  As soon as I got home I started looking online for ideas of how other teachers had put their planners together.  I started watching video after video with tutorials for making all the cool accessories. Being a frugal and crafty teacher, I'm now having a blast creating all the goodies that go in my planner.  

Here's what I've done so far.
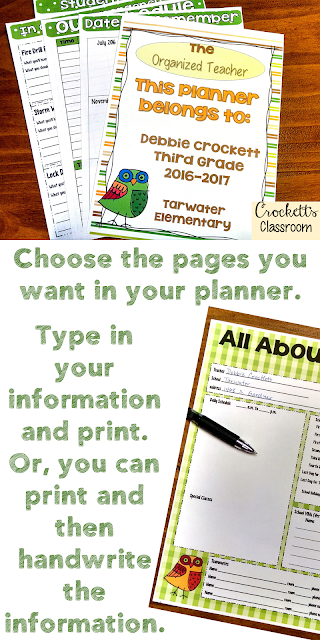
Step 1:  Decide what pages I wanted in my planner.  You can either create the pages yourself in PowerPoint or buy a packet from a TPT seller. Of course, I used the Organized Planner from my own TPT store. Then you can print the pages you want to go in your planner.  

My old printer recently died so I bought a new one that prints double sided. Much easier when printing for a planner.   If your printer does single sided only, you can print all the odd number pages. Then put the paper back in and print the even number pages.  

I chose pages with teacher and student information, calendars, long and short range planning pages, and  grade/record keeping pages.


Teacher planner with a discbound planner,  I'm obsessed! You can choose the pages you want, instead of making do with a planner put together by someone else.


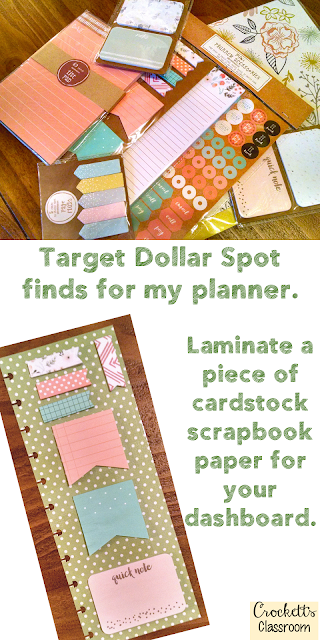
Step 2:  Add the extras-- This is where the fun starts! The first thing I made was a dashboard.  All I did was laminate a piece of scrapbook card stock. Then I added these cute sticky notes from the Dollar Spot at Target.


Teacher planner goodies, make a dashboard to hold sticky notes.


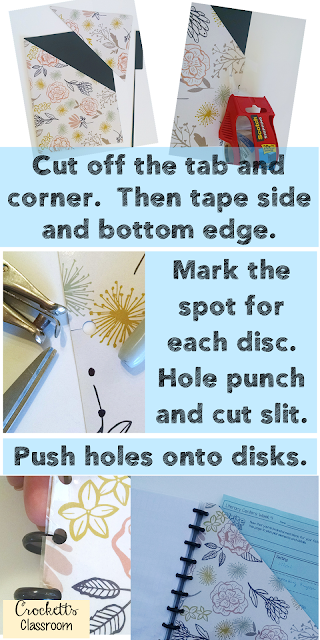
Next I made a pocket made from a Target Dollar Spot folder. Trim off the tab and a large chunk of the front corner to make the pocket.  I taped the edges to make the pocket a little more sturdy.  Next, I laminated it and scored across the pocket to open it.  Since the folder is thick It wouldn't fit into the small page punch made for the discbound pages.  So I used the cover of my planner to mark where the holes should be. Then I punched the holes with a regular paper punch and cut a slit with scissors.  Now I have a pocket to hold notes, reminders, etc. 
Discbound planner folders are super simple to make.  They are a handy place to hold all the notes and reminders teachers need to keep.

That's what I have so far in my teacher planner.  What do you think is handy to have in your teacher planner?
1


your photo name

Surf's Up on a New School Year!

Surf’s up!  Let your kids surf into the summer or new school year with this fun craft activity.
Craft activity that will send your students surfing into summer or into a new school year.  Find out how to make these cool crayon transfer surf boards!


Materials: fine grain sandpaper, 150 grit works well.
light blue and light brown paper, two 9X12 pieces for each student.
glue, crayons, scissors, and surfer boy and girl patterns. The free download (click on the picture) has all the patterns you need for this craft activity.

You'll need sandpaper for the surfboards.  Let the kids trace the surfboard pattern onto the sandpaper and cut them out.  Then have them color the designs on the sandy side of the sandpaper.  Simple designs work best.  It's also important that they color very darkly.  Have them press firmly as they color so the surfboard is completely covered with the wax from the crayon.  You'll be using an iron to transfer the crayon wax to the final picture, so you need a heavy layer of crayon on the sandpaper surfboard.


Crayon transfer art activity with a surfing theme.  Kids will love seeing their surfboard design is transferred to the paper with the heat from an iron.  The final result is really eye catching.

For the background you can use blue and beige paper, blue for the ocean and beige for the beach.  I had the students cut a wavy line off the edge of the beige paper and glue the pieces together to make one tall background.

Students can decide if they want the surfboard standing with them on the beach, or in the ocean with their character riding the waves. In the free download you'll find the patterns for the surfboards, the girl and boy figure, plus a few accessories.  The kids can draw and color in anything else they want in their beach scene. 

Hope your kids enjoy this activity to surf into the summer or sail into a new school year!
0


your photo name

Summer Pen Pals

This simple idea will encourage your students to keep reading and writing through the summer!  
Summer Pen Pals, encourage your students to keep reading and writing through the summer by being pen pals with each other.

Before the end of the year have each student bring in two stamped envelopes.  (Or just two stamps if you already have envelopes.) Show them how to write their address on the front of each. Then collect the envelopes.  Of course, they'll all be curious about these envelopes, but don't tell them anything yet. Let the excitement and curiosity build a little!


Later, or the next day, explain to the students they are to read a book this summer.  After they read the book they'll write a letter to a friend to convince them they need to read this book. They will place the persuasive letter in one of the envelopes and mail it to a classmate.  They will include in the second envelope that has their own address on it.  The second envelope will be used by the receiver to write a return letter!
Click on this image for the directions and letter to send home with students.

 Summer Pen Pals, super easy and fun idea to encourage your students to read and write through the summer.


0


your photo name

Say it in a Postcard

 Postcards are the perfect way to reach out to your kids with birthday wishes, words of encouragement or to celebrate accomplishments.


Do you remember how excited you felt the last time you got a card or letter in the mail?  In our world of email and texting that thrill is disappearing.  But, what if I told you there's a way to bring that excitement to your students and not break your budget?!

I recently discovered a company called Send Out Cards.  This online company is unique because you can select and personalize cards that are sent through the mail.  These aren't e-cards, they're real, hold in your hand, treasure forever cards and postcards. 

One of my favorite features of the site is the scheduler.  The very first thing you should do is add all your student addresses to the Contact List. Then, at the beginning of the year you can set up a schedule to send out a birthday card to all of your students. All you do is choose a card, add a personal note and your name.  Then, schedule the date you want it sent.  Once your cards are scheduled you don't have to worry about ever missing a student birthday!

Birthdays aren't the only time to send a message to your students. What about those days when a student needs a little encouragement, or has reached an important goal?  You can quickly and easily send out a personalized postcard to any student at any time! 
 Kids love getting real mail! Send them a postcard when they need a little encouragement, to celebrate an accomplishment, or just for fun!

I also love that each postcard costs less than $1.00!  The site works on a point system.  You can purchase different amounts of points.  The more points you buy, the cheaper each point.  For example, 100 points are $59, so that's $.59 for each point.  It costs 1 point to send a postcard.  With the $.35 postage that comes to $.94 for each postcard.  Regular, folding cards cost 3 points, which is still much cheaper than you'll find in a card rack at the store.

You can get started with Send Out Cards  now by sending a free card. Click on this link. Then click on the menu icon (three little bars in the upper right hand corner) to send a free card.
 Check out Send Out Cards for your classroom.  Follow this link to send out a free card!

0


your photo name

Student Learning Journals . . . Responses and Reflections

Your student have learning journals, now what do they write about?  Get ideas for using your journals for reading responses.

Journals are a place for students to write responses and reflections about their learning.  Journals can hold important notes or information about current lessons, or be a place for students to express their opinions and thoughts about their learning.

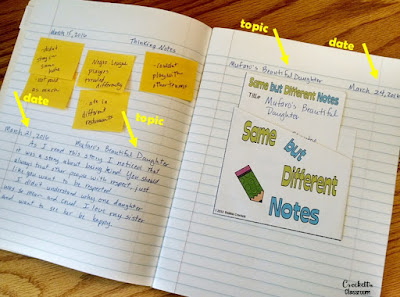
One important step to to begin using learning journals is to model your expectations for the use and care of the journals.  Show students how to use the tabs in the journal.  I was always amazed that students didn't know that the page with the tab is opened and the information goes on the pages after the tabbed page.  Then decide what you want on the page.  I liked to see the date on a line on the outside edge of the page and the topic, story or assignment toward the inside of the page.  This made it easy to keep track of the journal entries.   Like this: 
Do you love using student learning journals as much as I do?  I'm sharing tips and ideas for helping students organize their responses so you can get the most from your journals.  This is a must read!

Tip 1:  Keep a journal that models exactly what you want the kids to write in their journal, with the date and assignment.  That way you'll never forget what you've asked the students to write in their journal!   
Tip 2:  If you're asking the students to write a response or reflection make sure you are very explicit in what you expect them to write.  Model the response you want several times.  You can even keep the format posted in the room for students to use as a reference.
Tip 3:  You can give students a response or reflection stem. This helps keep their response or reflection focused on a topic.  Here is a list of ideas to get you started. Click on image for the free download.


Great tips for keeping your students engaged with reading journals.  These thinking stems are designed to challenge and engage students as they interact with text.

 Tip 4:  After you explain the response stem, give students time to talk about their thinking in a small group or with a partner. This helps spark new ideas for the students who are often "stuck".
Tip 5:  Display the format you require for the response. You can have a general response format displayed on an anchor chart, or your open journal under a doc camera.
0


your photo name
Back to Top