Student Learning Journals . . . Responses and Reflections

Your student have learning journals, now what do they write about?  Get ideas for using your journals for reading responses.

Journals are a place for students to write responses and reflections about their learning.  Journals can hold important notes or information about current lessons, or be a place for students to express their opinions and thoughts about their learning.

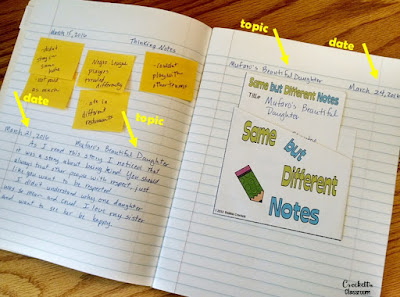
One important step to to begin using learning journals is to model your expectations for the use and care of the journals.  Show students how to use the tabs in the journal.  I was always amazed that students didn't know that the page with the tab is opened and the information goes on the pages after the tabbed page.  Then decide what you want on the page.  I liked to see the date on a line on the outside edge of the page and the topic, story or assignment toward the inside of the page.  This made it easy to keep track of the journal entries.   Like this: 
Do you love using student learning journals as much as I do?  I'm sharing tips and ideas for helping students organize their responses so you can get the most from your journals.  This is a must read!

Tip 1:  Keep a journal that models exactly what you want the kids to write in their journal, with the date and assignment.  That way you'll never forget what you've asked the students to write in their journal!   
Tip 2:  If you're asking the students to write a response or reflection make sure you are very explicit in what you expect them to write.  Model the response you want several times.  You can even keep the format posted in the room for students to use as a reference.
Tip 3:  You can give students a response or reflection stem. This helps keep their response or reflection focused on a topic.  Here is a list of ideas to get you started. Click on image for the free download.


Great tips for keeping your students engaged with reading journals.  These thinking stems are designed to challenge and engage students as they interact with text.

 Tip 4:  After you explain the response stem, give students time to talk about their thinking in a small group or with a partner. This helps spark new ideas for the students who are often "stuck".
Tip 5:  Display the format you require for the response. You can have a general response format displayed on an anchor chart, or your open journal under a doc camera.
0


your photo name

Student Learning Journals . . . Getting started

Student Learning Journals . . . Getting Started.  Have you been wanting to use journals in your classroom?  Here's some practical advice on how to get that ball rolling!

How many times have you asked yourself if it's really worth all the time and effort to have your students keep journals.  It takes time to set them up, time to teach and model how to write a quality response, time to keep them organized, time for students to write responses and of course, time to read them.  But with all these factors I think they are well worth all of this time investment.

Student learning journals give teachers and students a way of looking at their thinking.  It's also a great resource students can use all year to look back at important ideas and concepts.  I often told my students that I can't open their heads and see what's inside.  They need to bring all of that understanding out so I can see what they're learning.  Learning journals are a great way for students to keep track of and show what they know.  

Now, let's get them set up.

There are several decisions you'll need to make before you introduce the journals to your class.
1.  Spiral notebook or composition book.  I prefer composition books because the pages stay in better.  I absolutely hate those wire spirals and what happens to them through the year!  The backing on the composition book is thicker and will easily last through the year. Look for back-to-school sales.  I could usually pick them up for less than $1 each.  Even though I asked students to bring in their own, I liked to have several on hand for students who couldn't provide their own.

2. Single subject journals or multi-subject journals.  You can set up one journal for each subject, such as, reading, writing, math, and science/social studies. Or, one journal, sectioned off, for different subjects.  I've tried it both ways through the years and finally settled on having two journals for each student.  One called an ELA Journal (reading, and writing) and one called a MSS Journal (math, science and social studies).  One year I put all subjects in one journal and found that the journal was full by mid-year. I had to have a second journal for the second semester.  Starting the year with two journals gave me enough space to last through the year. 

You can do a little calculation to get an estimate on how many journals you'll need for each student.  One composition book has 100 sheets of paper, or 200 pages.  If you plan on having two subjects in that journal, that's 100 pages to write on for the year. 100 pages divided by 36 weeks comes to 2.7 pages per week.  That should be enough for a few short entries and maybe a full page interactive notebook page each week.  If you plan to use more pages each week you may need a journal for each subject.

3.  What will you be writing in the journal?  Making this decision will affect how many journals you need.  Will you use the journals for student response?  interactive notebook elements?  class notes?  or a combination of all three?  I liked to use the journals for all three of these purposes.  I had students paste in interactive notebook elements if it was something I knew we'd want to refer to again and again.  If the interactive notebook element wouldn't be needed again we'd paste it onto a single piece of notebook paper to keep in our binders, which was emptied at the end of each quarter. Along with the interactive notebook pages I'd also have the students write important notes, tips, reminders, etc. so the information would be there as a reference source for the rest of the year.  The learning journals was also used to hold student reflections and responses. My goal was to have students write a response in each subject at least once a week. The responses were usually about a half-page long and asked the student to reflect on their learning or respond to a question.  (More about responses and reflections in a later post.)
Student Learning Journals . . . How do you get started?  Find out how to choose the right type of journal and how to get them ready for students.

Prepping the Journals
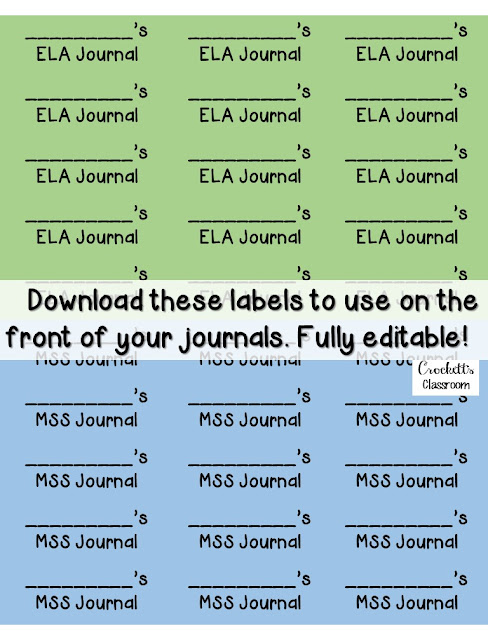
Before students begin using the journals you need to get them prepped.  Like I mentioned before, I put composition books on my supply wish list.  In my school, students usually brought in everything I put on that list.  But, just in case, I always had a supply of composition books for students who couldn't bring in their own. Sometime during the first week of school I gave students time to decorate the front with pictures or stickers they brought in from home.  Many students liked the picture on the front of the journal they purchased and chose not to add anything else. The only thing I put on the front was a label that said the name of the journal and the student name. (You can download a free set of editable labels below.) I put this in the top right hand corner of every journal. I also added tabs for the subjects.  The tab was simply an address label, folded in half, attached to one of the pages. If you have older students they can be shown how to put that tab on the first and middle page of the composition book (for two subjects).  If you have three subjects, count over 33 pages to add the second tab and 33 more pages for the third tab.
Free journal labels for the front of student learning journals, Fully editable.

Now, you're all set to begin using the learning journals!  Check back next week for the next post in this series . . .  Responses and Reflections.


0


your photo name

Every student can be a S.T.A.R. Problem Solver

Every student can be a STAR math problem solver.  If you hate hearing the moans and groans every time your students have to solve word problems you need to read this blog post!  Find out how to help all your students master math word problem strategies and become STAR problem solvers!

With the right tools, every student can be a star with problem solving.  You just need to show them how to read and understand the problem, much like you teach comprehension during your reading lessons.  

Using the I do it, we do it, you do it  model I first teach the 4 steps to problem solving.

I do it-  I read the word problem and do my thinking out loud so the whole class can hear my thoughts and the questions I'm asking myself. I show them how I figure out what the story problem is asking and how to pull out the important information.  Then I model one of the problem solving strategies, find the solution and most importantly, go back to review and check my answer.

We do it- First I'll read the problem and ask some of the thinking aloud questions and let the students respond. Gradually, I'll lead them to do the think aloud part.  After we've figured out what the problem is asking and pulled out the important information we'll choose a strategy and solve the problem.  I may have them solve the problem with a partner or on their own.  Then we share solutions, making sure to discuss that there is usually more than one way to solve a problem.  We always end with a review and answer check, which I consider one of the most important steps in this process. 

You do it- After several days of doing the problems together, the students are ready to solve a word problem on their own.  At first they'll need visual and verbal cues for the steps, but gradually, these steps should become automatic.  I like to begin the "You do it" phase with partners and move on to individual work later. 

The problem solving steps follow the acronym-STAR 

Stop and read the problem
Think about a strategy
Act, or carry out the strategy and solve the problem
Review the problem and check your answer
(You can download this free poster to introduce the STAR steps.)
Every student can be a STAR math problem solver.  If you hate hearing the moans and groans every time your students have to solve word problems you need to read this blog post!  Find out how to help all your students master math word problem strategies and become STAR problem solvers!

I teach the kids eight basic strategies that are used with the STAR steps. I usually follow this order;

  • use manipulatives
  • draw a picture
  • make an organized list
  • find a pattern
  • make a table or chart
  • guess and check
  • use logical reasoning
  • work backwards
I think the easiest strategy to begin with is using manipulatives.  This is a very concrete way for students to visualize what is going on in the problem.  The manipulatives can be little blocks, teddy bear counters, clocks, coins or anything that can be moved around to "act out" the problem.

After using manipulatives I usually teach the strategy draw a picture. I think this strategy is my favorite.  I'm a visual learning and sketching out the information helps me make sense of the problem.

The other strategies can be taught in any order.  I do suggest that you spend several days or a week on each strategy before introducing a new one.   Most problems can be solved in multiple ways.  Some kids will even use parts of two or three different strategies to solve a problem.  One thing I require is that they be able to explain their thinking. They need to be able to tell what they did and why.

I only teach one strategy at a time.  Depending on my group of students and their previous experience with these steps and strategies I'll spend about a week on each strategy.  These strategies will help students solve almost any word problem they will ever come across.  I don't teach key words.  Not all word problems have key words and not all word problems require an addition, subtraction, multiplication or division equation.

Some strategies work better with certain problems, but most word problems can be solved using several different strategies.  After the students are familiar with 2 or 3 strategies I'll have several days where I'll give them a few problems and let them choose the strategy they want to solve the problem.  I love it when students use different strategies and they all come up with the same answer!

We always take time to share our strategies and thinking.  I also ask them why they chose a certain strategy.  Sharing their thinking aloud is very important because it lets the students who may be struggling have a "peek" inside their brains!

1


your photo name

Spring Garden Writing Genre Project

Time to get outside and enjoy the beautiful spring weather!  Spring also means it's time for last minute test prepping!  Well, I have a fun way to review six different writing genres with your students.

In this engaging project students write six different papers, each about a garden, but each is also a different genre.  Sticking with one theme, but changing genres, will give students a better idea about the differences between writing genres.  Here are the genres and topics:
 Spring Garden Genre Writing from Crockett's Classroom on TPT.  This project will keep your kids engaged even though spring is in the air!
(Click on this image to see the packet in Crockett's Classroom on TPT)

The packet also includes an idea for an inside garden, six writing guidelines, six graphic organizers and six different publishing papers. You can have the students put all the finished papers together into a booklet.  Two different covers and an About the Author page is also included.  This makes a great project for end of the year conferences or open houses.


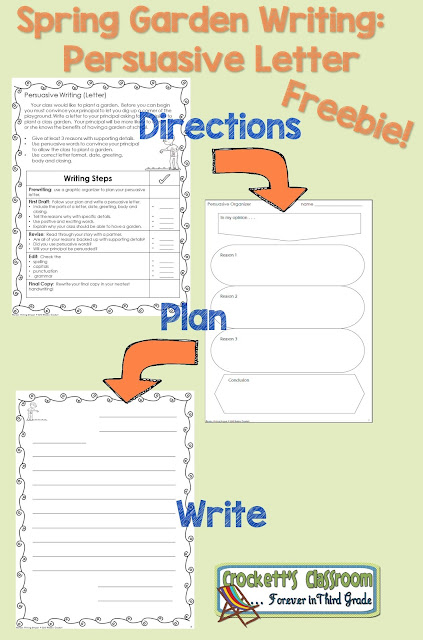
The best news is you can download and try the persuasive writing piece for free!  Click on either of these images to give it a try in your classroom.
 Ready for spring!  Get your kids excited about writing with this freebie from Crockett's Classroom.

 Spring is here!  It's not easy to keep students focused on their lessons when it starts to get warm and everything is turning green.  This writing project will keep your kids engaged and it's a great way to review six different genres of writing!

1


your photo name
Back to Top