Showing posts with label beginning of school. Show all posts

5 Activities for a Positive First Week of School


    There’s nothing like the first day of school. Everything is fresh and new. Expectations are high and everyone’s a little nervous. From day one I want to be sure my new students know that our classroom is a place where everyone is accepted and kindness is normal. The first day of school can be a little hectic. That’s why I make sure to plan activities that not only help us get to know each other but also establish a classroom that thrives on positive energy. 


Here are five of my favorite ways to get the school year off to a positive start. 

1.  Parent Questionnaire 

Before the year starts ask parents to tell you a little about their child.  One easy way to do this is during Meet the Teacher. Set out a short questionnaire for parents to fill out.  Keeping it brief will make it easier for parents to complete during the meet and greet.  You can choose a few of these questions, or come up with your own.

-Tell me one thing your child loves to do.
-My child is really good at ________.
-Tell me about one fun thing your child did this summer.
-My child's most unique talent is _______
-Three words that describe my child are _____, ______, _____.

Not only will this information help you get to know your students, but you can also use it in your first week's activities.  

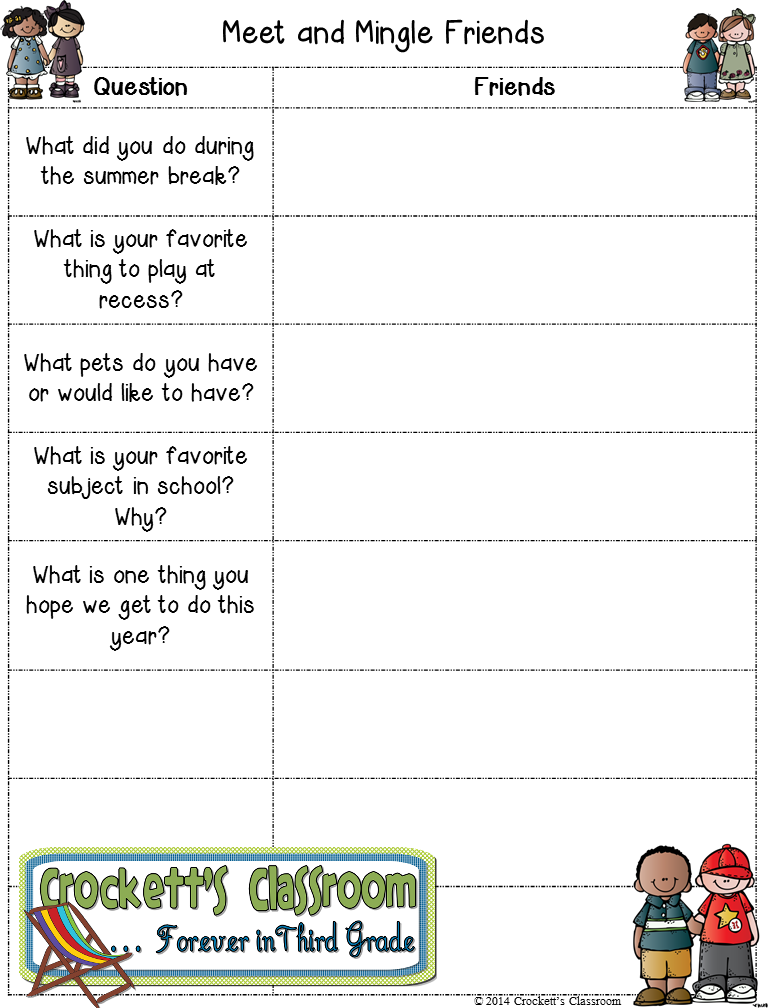
>One way I use this information is to create a classmate bingo game.  I type in one piece of information about each student.  Then students can mingle and try to find the classmate for each square on their Bingo board.

>Another way to use some of the information is to play "Who is It"?  I choose one of the parent forms and read a bit of the information and see if students can guess who I'm talking about.

>You can use the information to call students to line up.  For example: "Our classmate who is adventurous, loves to do cannonballs in the pool, and has two younger sisters can line up"


First week of school activity, memory jay

2.  Start a Memory Jar

Wonderful memories of the school year begin from day one.  Collecting these memories in a large jar is a fun way to keep all of these memories.  For the first week of school, I like to model how to choose one positive, important, or funny thing that happened during the day and write it on a slip of paper.  In future weeks the kids can start brainstorming ideas of a memory to add to the jar.  Sometimes I give table groups 5 minutes to come up with one memory.  Then the class votes on one to add to our jar.

At the end of each quarter, we pull out some of the memories to share.  It's a fun way to relive some of the best times we had as a class.


Use a simple jigsaw puzzle to encourage positive behavior.


3.  Great Team Puzzle

With a jigsaw puzzle from the dollar store, you can have a fun way to encourage positive behavior.   The puzzles I found have either 24 or 48 pieces.   You can use either size, depending on how frequently you'd like your class to earn the whole-class reward. 

>First, attach a magnet to the back of each piece.  With the magnet, the pieces will stick to your whiteboard as the puzzle is put together.

>Next, set the criteria for earning a puzzle piece.  You can focus on one expectation each day, or leave it open to any positive behaviors you see throughout the day.

>Whenever you see a student or group of students behaving in a kind, respectful, or caring way, let the class know.  Let a student pull a puzzle piece from the box.  If the piece fits with a piece already on the board, they attach it.  Otherwise, it's left on the board, to be attached later.

>Once the puzzle is complete the class can have a special reward.  My kids always loved extra free time, or 5 minutes of extra recess.  


This editable flip book is just what you need for the first week of school.

4.  Class Flipbook

Instead of giving your students a printed booklet with procedures and expectations, let them create one for themselves.  As you present and talk about all of the important class and the school information, students add that information to the flipbook.  By the end of the week, each student will have learned about the routines and expectations for the class, plus, they'll have a personal flipbook to refer to whenever they need a reminder.

Give each student a blank flipbook that you have set up.  You can use this free editable template.  To get it ready, type in the headings and space. Then print, fold and staple.  The complete directions are included in the free download. 

Click here for the free editable template you can use with your class.  (This is a PowerPoint file and will be editable once you open it in your PowerPoint program.  It is NOT editable when it first opens in your browser.) 


Introduce important life lessons at the beginning of the school year with Winn Dixie

5.  Life Lessons with Winn Dixie

I saved my favorite activity for last.  After I read the book, Because of Winn Dixie, for the first time I knew I wanted to share it with my class of third graders.  Not only is it a wonderful story about friendship and acceptance, but it also sparks some really wonderful discussions.  I started using it as my first read-aloud of the year and quickly realized that we were talking about many positive qualities I wanted to see from my students.  So I put together a list of positive qualities and character traits.  Next, I chose 13 of these traits and called them Life Lessons we all need to learn. (honesty and truthfulness, curiosity, compassion, responsibility, courage, teamwork, respect, loyalty, generosity, friendly, self-control, perseverance, and joyfulness), Then I found parts of the book where the characters are showing these traits.  

Now, when I read Because of Winn Dixie, we stop and talk about these life lessons.  I also made small signs for these life lessons that go up on a display so we can refer to them all year.  The kids also have a response journal with a prompt about the life lesson for that day.  I love starting the year with this shared experience.  We talk about these life lessons all year and use the characters from the book as a reference. 

Hopefully, one of these activities is just what you were looking for to get your year off to a positive start.  I'd love to hear about other first-week activities you love doing with your students.

Click on this image to check out this resource in my TpT store:

Because of Winn Dixie, it's going to be a terrific year.


5 Activities for a Positive First Week of School


4


your photo name

Would You Rather Daily Question


I love the first week of school because it’s a clean slate.  The room is clean and perfectly organized, the year-at-a-glance plans are written, name tags are on the desks, and your supply cabinets are filled with unbroken crayons. 


Now the butterflies in your stomach begin to flutter madly.  What do you actually do with your kids during the first week?  Getting to know your students and establishing a kind and caring community is a must for the first week of school.  I have a few ideas to share with you in the next few weeks that will help tame those butterflies.  


Daily Would You Rather Question

Here's a quick and fun way to get to know a little about your students.  You've probably heard of the game Would You Rather.  It's a set of questions that ask the player to choose between two items.  Sometimes the choices are two things you'd really want and sometimes they're things you don't want at all!


My version of the game asks kid-friendly questions.  They're meant to get kids engaged in interesting discussions as they get to know each other.


Preparing for the activity:

On the first day of school, take a headshot photo of each student.  (These photos will come in handy for many projects throughout the year.) Then digitally crop the photos so just the head and shoulders can be seen.  I like to crop them into a circle before I print them.  You can laminate them before you cut them out.  That way you can use them for other projects.  If you plan to use them on a magnetic whiteboard, you can attach a magnet to the back. 


Now you can get your display ready.  I created a set of labels you can download and print for your display.  This is a PowerPoint file, so make sure you have that program before you download it. 


Would You Rather Freebie


This file not only has the editable labels, but it also has a few Would You Rather  question cards you can use with your class.


New!  I've just added a digital version of the Would You Rather  questions.  The download has a link so you can add it to your Google Drive.  


Ready to go!

Now you’re ready for the question.  I like to use questions that help me get to know my students and lead to spirited discussions.  The questions should not have right or wrong answers.  It's okay if the kids have a hard time choosing just one response.  Making difficult choices really gets the students to join the discussions.


Have the question displayed and the two choices on the Would You Rather board.  After you introduce the question, let students place their photo on the side for their choice.


Would You Rather Daily Question Display,  Great way to get to know your students during the first week of school.

This type of question is also an excellent writing starter.  You can have students explain their choice in their writing journal.  Or, assign it as part of your homework for that week.


If you'd like to have more Would You Rather cards and other back-to-school ideas, check out this Ultimate Resource Bag.  It has 10 activities to use the first week of school to get to know your new students and begin setting the tone for a kind and caring class.


0


your photo name

Daily Agenda

The Easiest Daily Agenda, EVER!

Editable Agenda---Crockett's Classroom

Right now you probably display the schedule for the day somewhere on a whiteboard.  On the whiteboard, you can erase the daily lessons/activities/events every day and write in new ones.  The problem with this is the agenda is gone at the end of each day!  But I have a way to keep your daily schedule/agenda.  This way it will serve as a record of the lesson objectives, activities, lessons, assignments, and other important class information.

Here’s how. . .
  • Download the editable PowerPoint file here.
  • Using the PowerPoint type out a basic daily agenda in the text boxes.  You can copy and paste the sets of text boxes if you need more time slots. Or, delete the ones you don't need. 
  • Once you have the basic layout, duplicate that slide 5 times, one for each day of the week.  (My school was on a 6-day rotation for special classes so I made 6 slides.)
  • You now have an editable agenda page for each day of the week!      (Click on the image to download.)
This editable agenda makes it super easy to keep a record of what goes on in your classroom every day!

  • The editable text boxes can have the times, subjects, lessons, page numbers, due dates, etc.  At the bottom, I like to keep a record of who is absent that day and a spot for class reminders.

Now, you’re all set!  I like to have the agenda up on the big screen as students walk in.  That way they’ll see the schedule for the day.


As we go through the day I type in brief notes to summarize what we did.  I also type in any assignments or projects with their due dates.

Here's the unique part of doing your agenda in this way.  At the end of the day save it with the day's date.  That way you can go back to that day at any time to see what happened! In my files, I have an agenda folder for each month.  I save the files by date into that month's folder.  Now I have a record for the whole year.

You can also print out that one page, hole punch it and keep it in a binder.  When a student returns after being absent they can look through the binder and easily see what he/she missed.

You can also upload the PowerPoint file to your Google Drive as a Google Slide.   Use it to communicate with your students and parents about assignment details and due dates.


0


your photo name

Simplifying Classroom Jobs

Classroom jobs, how to keep them simple, yet effective.  We want our students to have responsibilities in our classroom, but when we end up giving hundreds of reminders it becomes too much to manage.  Learn about a simple way to keep your classroom jobs effective.

Most teachers would agree that classroom jobs are important. The challenge is how to make the jobs meaningful and how to get students to take responsibility for them.

Throughout my years as a classroom teacher, I tried so many different systems.  Some were okay, but most of them ended up being more of a chore for me.  I got so tired of giving reminders to students about their job.  Much of the time, students had jobs in name only.  I ended up doing all the work myself.


As with most things, the simpler, the better.  A good friend of mine has one of the best job systems I’ve ever seen.  It’s simple and the kids really do their jobs!  The system has four class jobs; Teacher Assistant, Classroom Clerk, Public Relations, and Health & Safety.  Each job has several responsibilities.  

Classroom jobs, how to keep them simple, yet effective.  We want our students to have responsibilities in our classroom, but when we end up giving hundreds of reminders it becomes too much to manage.  Learn about a simple way to keep your classroom jobs effective.

Now, here's how this system is unique and effective.  Each week there are two people assigned to the job.  One is the Expert and the other is the Apprentice.  The Expert is in their second week of having that job and the Apprentice is new that week.  The teacher doesn't have to train the students for their new jobs every week, that's up to the Expert!  The Expert is responsible for making sure the job responsibilities are completed as well as training the Apprentice.  The next week the Apprentice moves up to be the Expert and a new Apprentice is assigned to the job. With two students responsible for the job, things get done!

Classroom jobs, how to keep them simple, yet effective.  We want our students to have responsibilities in our classroom, but when we end up giving hundreds of reminders it becomes too much to manage.  Learn about a simple way to keep your classroom jobs effective.

She also has a fun way to give recognition to the eight job holders for the week.  The expert gets the lanyard with the job description and the apprentice gets the name tag that also fits into a little holder that can be placed on top of his/her desk.

You can download an editable version of these job cards here. (Just click on the image.)

Classroom jobs, how to keep them simple, yet effective.  We want our students to have responsibilities in our classroom, but when we end up giving hundreds of reminders it becomes too much to manage.  Learn about a simple way to keep your classroom jobs effective.


0


your photo name

Keeping it Positive

"Sticks and stones may break my bones,
but words can never hurt me."

Of course you’ve heard this saying and may have even used it to try and comfort a child who  just had unkind words hurled at them.  But I say it’s untrue.  Words do hurt.  Even as adults, we’ve heard things that hurt and sting for a long time. To a child even the smallest insult can have a larger impact.

During the first week of school. teachers spend a lot of time teaching procedures.  They also explain the behavior expectations and the classroom management system for the year. One activity you should add to your first week is this simple activity that shows the lasting effect of unkind words and actions.
1.      Begin by asking the kids what unkind words they've heard other kids say.  Write these words on some of the Sticks 'n' Stones slips. You'll need them later on in the activity.
2.    Now give each student a piece of paper with a blank human figure on it.  Ask them student to color the figure to look like themselves. As you wonder around the room make lots of positive comments about their work.  You want the students to be super proud of their figures. After they finish coloring the figures, students should cut out the figures and write their name on the back.


3.    Have students sit in a circle with their finished figure, a pencil and crayons. Tell students to pass the cutouts to the person on their right.  Read one of the Sticks 'n' Stones cards and tell students that those words hurt. Ask the student holding the figure they received to make a tiny tear in one of the legs.  Make sure it’s small.  (You might hear a few gasps when they see their figure being torn.)
4.    Pass the figures to the right again and read another Sticks 'n' Stones card.  This time ask students to use a crayon and draw a dark zig-zag line across the center of the body. (make sure the color they use shows up on the figure.)  
5.    Pass the figures again and read a Sticks 'n' Stones card. This time have them draw an X on the face with their pencil.
 6.   You can continue passing the figures as many times as you want, reading the Sticks 'n' Stones cards and adding other tears and marks to the figures.  I usually had the students do 5 or 6 things.
7.    On the final rotation read a Sticks 'n' Stones card and have students crumple the figures into a small ball. Collect the crumpled figures.
8.  Students now return to their desks as you gently uncrumple the figures and give them back to the owners.  When the students have their own figure they can try to repair themselves by flattening, smoothing, erasing, or taping.  They'll notice that no matter how much they flatten, smooth, erase or tape their figure the damage can still be seen. 

Now is when you can talk about the effects of unkind words and hurt feelings.  Once words are heard or read, some part of them remain in our memories and continue to hurt. The figures will make a great display about using kind words.

 Sticks and Stones,  words really do hurt. This activity will show your students the damage even the smallest words can do to someone else.

Click on this graphic to download printable for this activity and to receive a free sample of my Positive Behavior Tool Box (SPARKLE).
0


your photo name

Surf's Up on a New School Year!

Surf’s up!  Let your kids surf into the summer or new school year with this fun craft activity.
Craft activity that will send your students surfing into summer or into a new school year.  Find out how to make these cool crayon transfer surf boards!


Materials: fine grain sandpaper, 150 grit works well.
light blue and light brown paper, two 9X12 pieces for each student.
glue, crayons, scissors, and surfer boy and girl patterns. The free download (click on the picture) has all the patterns you need for this craft activity.

You'll need sandpaper for the surfboards.  Let the kids trace the surfboard pattern onto the sandpaper and cut them out.  Then have them color the designs on the sandy side of the sandpaper.  Simple designs work best.  It's also important that they color very darkly.  Have them press firmly as they color so the surfboard is completely covered with the wax from the crayon.  You'll be using an iron to transfer the crayon wax to the final picture, so you need a heavy layer of crayon on the sandpaper surfboard.


Crayon transfer art activity with a surfing theme.  Kids will love seeing their surfboard design is transferred to the paper with the heat from an iron.  The final result is really eye catching.

For the background you can use blue and beige paper, blue for the ocean and beige for the beach.  I had the students cut a wavy line off the edge of the beige paper and glue the pieces together to make one tall background.

Students can decide if they want the surfboard standing with them on the beach, or in the ocean with their character riding the waves. In the free download you'll find the patterns for the surfboards, the girl and boy figure, plus a few accessories.  The kids can draw and color in anything else they want in their beach scene. 

Hope your kids enjoy this activity to surf into the summer or sail into a new school year!
0


your photo name

First Day Tried and True


  There's no excitement like the The-first-day-of-school excitement!  I don't care how many years you teach that very first day is full of nerves, jitters and joys.
First Day word building freebie

During the first week of school my plans include activities that give students time to get to know each other and build a sense of family and belonging.  One activity that gets them working together is this word building game.  It's super simple and the kids always love it.

Begin by dividing your class into groups of four or five students. Give each group a baggie with a set of letters. Tell them that each group is going to see how many words they can make with the letters.  It's always interesting to observe how the groups begin this little activity.  You'll quickly see some of their personalities come out.

What the students don't know is the letters spell something special.  I like seeing if any group figures that out on their own.  After about 15 minutes I ask if anyone has figured out the word that can be made using all the letters.  (Click on the graphic to download the free activity.)
Start building teamwork from day 1.  Use this first day word building activity to get kids working together.  A great activity for kids to begin making new friends.

This word building fun can last as long as you want.  Some years the kids really get into it and we go for 45 minutes.  Other years the group keeps their interest for only about 20 minutes.    


1


your photo name

Name Activities


Back to school name activities, Learning new names at the beginning of a new school year.

The most important thing you do at the beginning of the school year is to learn the names of your new students!  Even before the kids walk in the door, most teachers have name cards in place and display boards with student names waiting for artwork to be added.

Not only do you need to learn the name of all your students, but the students also need to learn the names of all their new classmates.  Here are a couple of fun name activities you can use in the first week of school.

Name Scoot:  Students are given the Name Scoot paper and asked to write their first and last name at the top.  (You can write it for them if they don't know how to spell their last name.)  There are also two statements they complete about themselves.  During the scoot game, other students learn a little bit about their new classmates and write a word that can be made with the letters in the name.

Learning Names, Name Scoot, Back to School Activity


All About my Name
Behind every name is a good story.  Do you know why your parents chose that name for you?  Do you have a nickname?  How did you get that nickname?

Sharing stories about our names is a fun and interesting way to get to know your students.  During the first week, send home this "What's in a Name"  survey.  When students bring them back share a few every day as you get to know your students.
**Please be aware, if you have students who live with a guardian, or in a foster home, this activity may not be appropriate.


What's Your Name, Name Survey,  Back to School Activity

Click on the image below to download these two free name activities from my TpT store:


Names are also a huge part of your classroom management system.  It seems I was always needing a list of student names--checklists, tracking participation, arranging groups, etc.  

Here are a few tips for managing names in your classroom.
-Full page checklists with data columns.  Good for tracking assignments turned in through one week or homework turned in for the month or grading period.

-Single column checklist.  I used these to attach to a set of papers to track who had turned in their work.  I could fit 3 on one piece of paper then cut them apart to use one list at a time.  These also work well when the office or another teacher needs a quick student list.

-Name sticks.  Love, love, love name sticks!  They are a great way to keep kids accountable and focused on lessons because they never know if their name is going to be called.  Depending on the discussion or situation you can always allow students to pass if their stick is called and they prefer not to participate.   I would make up several sets of sticks and have them in cans around the room.  That way there was always a set of sticks no matter where I was standing or having a class discussion.  If you meet with small groups I would suggest you have sets of sticks for those groups as well.

-Name tags.  I suggest you have a set of name tags ready to go the very first day of school.  I've seen them made with the plastic sleeves that pin on a shirt, or on a lanyard that hangs around the neck.  Name tags are wonderful to use when a substitute is there for the day or on field trip days, too.

-Name Labels.  You just never know when you need to stick a student's name on something- folders, projects, mailboxes, supplies, books . . .   I learned it was very helpful to print sets of labels with student names.  I usually had sets printed on the small return address label size (30 per sheet) and the larger address label size (10 per sheet).  That way when I was putting together literature or writing folders I'd add a label to the corner and each student had a folder, ready to go.


-Mini Cards.  Small name cards can come in real handy.  I kept several sets in my desk drawer. I'd use them to make new desk arrangements, sort students into project groups, or set up partners for field trips.


0


your photo name

Meet and Mingle Friendship Bracelets

Thrifty Thursday:  New Year, New Class and New Friends!


Today’s Thrifty Thursday is all about friends.  At the start of each new school year kids are making new friends.  One activity I love has the kids mingling, talking and meeting new friends.  Along the way they are collecting beads on a pipe cleaner that will be made into a friendship bracelet.  Super simple, but oh so fun!  It's a way for shy students to mix and mingle in a structured way. 
  

From the dollar store you'll need a couple of packs of pony beads and pipe cleaners and snack size zip baggies.  The bag I found has 250 beads will be enough for about 10 students.  The pipe cleaners came in a package of 20.

First---count out pony beads, each student will need one bead for each person in class.  You can include yourself.  So, if you have 23 students you'll need to put 24 beads in each baggie.  

Second--- copy the Class Friends Question sheet.  The sheet has 5 questions. There are also a few extra lines so you can add your own questions.  Click on the image to download a free copy.
 Meet and Mingle New Friends


Third---Explain to your students that they will be meeting new friends today.  As they meet a friend they ask one of the questions from their Meet and Mingle page.  After they finish talking to their new friend they write the friend's name next to the question so they'll have a record of all their friends' names. 

Fourth---Before they move on to mingle and meet another friend they exchange beads.  These beads are added to their pipe cleaner.

When they're finished they should have the name of every classmate on their sheet and their bead baggie should be empty.

Finally--- Students twist the ends of the pipe cleaner to form the bracelet.  The bracelet should be large enough to slip over their wrist, but not too large that it falls off too easily. 


2


your photo name
Back to Top