Showing posts with label writing. Show all posts

Get Your Writers Organized!

Learn how to make your own writer's folders.  Super simple and super effective way to help writers stay organized.


Using writing folders saved my writing block.  It's so frustrating (for me and the students) to be in the middle of a writing project, only to have a student say, "I can't find my paper."   Writing folders have helped us all stay on track and organized!

In late summer, as soon as Walmart and Target stock their Back-to-School aisle I look for their specials on pocket folders.  I can usually find them priced at 10 for $1.  That's when I put my writing folders together. They are a super handy way for students to keep their writing projects organized.  Putting two folders together gives you 4 pockets, which is perfect for the steps in the writing project. 

What I love the most about these folders is they are so easy for the students to use.  Whether they're working on their pre-writing with graphic organizers, drawing a picture, or working with a partner during the revising stage, they can store all of the pages they need in a writing folder.  

The pockets hold everything they need as they work through the writing process.  The first pocket holds the writing prompt, organizers, sketches, or anything else they need to begin planning their writing piece.  

The second pocket holds the pages they use for writing the first draft of their writing.  This pocket can also hold any notes or special instructions they need for a particular writing assignment.  As they move through each step of the process they move their paper to the next pocket.  

Writing folder.  A pocket for each step in the writing process - prewriting, drafting, revising/editing, and publishing.


The center of the folder (between pocket 2 and 3) is a great place to affix any writing tips or lists the writer may need.  I like to include characteristics of the traits of good writing, along with common synonyms and homophone lists.


Writing folder, the center holds writer's tips and lists.

The third pocket is where students keep their writing as they work on revising and editing.  The pocket can hold any checklists the writer needs as they work on improving their writing.  


Writing Folder,  pockets for revising/editing and publishing

The fourth and final pocket will hold whatever the student needs as they work on publishing their piece of writing.    After the final copy is finished, either rewritten by hand or printed from a computer, it can be placed in this pocket.  The students turn in their entire folder when it's ready to be evaluated.  It's nice to see all of the parts of the writing process as you evaluate their final writing.  

Once this writing project is completed, the pieces of work for this writing process can be stapled together.  It's a great way for students to see how their writing grew and improved throughout the writing process. This completed packet can be kept in a portfolio until the end of the year.   

The folders can be stored in a box or basket. Storing the student writing folders in a central location makes it convenient for both students and the teacher.  I often look through the folders to check on a student's progress.  One of the best things about these folders is fewer students mysteriously lose their papers through the writing process. 

Making the Writing Folders

To make the writing folder you need:
  • 2 pocket folders without the center prongs.
  • long-arm stapler
  • pocket labels for Pre-writing, Drafting, Revising/Editing, and Publishing.
  • Optional for the center,  writer's tips and word lists

Writing Folder,  Using two pocket folders and a stapler you can easily make folders that will keep writers organized all year!

Open the folders and put them together with the pockets facing each other.  Staple along the fold, from the outside folder.  That way, the staple ends will be on the inside of the finished folder.   The folder should open up so you see two pockets, then the blank center section, and finally, two more pockets.

Now you can add a cover, the pocket labels.  The blank center section is a great place to add any word lists or writer's tips your students might need.  These references are handy for your students to use all year.
 

Writing Folder, printable labels, cover and writer's tips and lists
 

Another option is to laminate the pocket folders before you staple them together.  If you choose to do this, make sure you add the labels, cover, and writer's tips and lists before you laminate.  After you laminate them, staple the two folders together. You may be able to use the laminated folders for two or three years.

The printable labels, tips, lists, and folder covers are included in my Writer's Folder and Checklists resource.  It has lots of choices for the cover, plus checklists your writers can use when they're revising and editing their work.  


Writer's folder with Checklists


Find out how you can keep your writers organized with these easy-to-make folders.  All you need is two pocket folders and a long-arm stapler.  The four pockets are great for holding all the papers student writers need as they work through the writing process;  prewriting, drafting, revising/editing, and publishing.  Your students will be so organized they'll be able to complete their writing projects on time!


0


your photo name

This is the Writing Game Your Kids will Love!

The Sentence Game
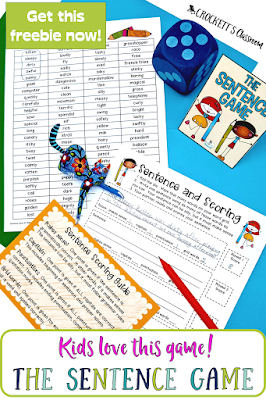
The Sentence Game,   Kids love playing this challenging sentence writing game.  Great way to practice grammar, capitalization, punctuation, and spelling.

Let’s face it, writing is hard.  It takes lots and lots of practice to master the many skills a writer needs.  But practice can be boring.   Not now!  I’ve created a sentence writing game your kids will love.  With this game they’ll write sentence after sentence without complaining, because it’s a game.

It’s very simple, but practices very essential skills- capitalization, punctuation, grammar, and spelling.

The Sentence Game,   Kids love playing this challenging sentence writing game.  Great way to practice grammar, capitalization, punctuation, and spelling.

The game can be played with 2 or more players.  There’s even a way to play it with your whole class.

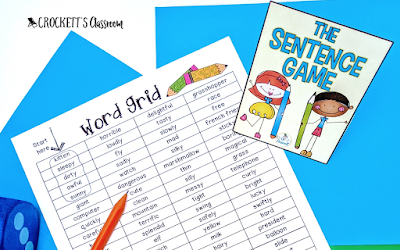
Each student needs a word grid and a sentence/scoring sheet.  Each set of players will also need one die and a scoring guide.

Here's how it's played:

Each player rolls the die.  The players then circle that number of words on their word grid.  They circle the words down the first column, in order.  Words cannot be skipped.

The Sentence Game,   Kids love playing this challenging sentence writing game.  Great way to practice grammar, capitalization, punctuation, and spelling.

Now each player writes one sentence, using as many of the circled words as they can.  If two sentences are written, only the first sentence will be scored.  All of the circled words do not need to be used, but players earn one point for each grid word in their sentence.  The words from the word grid cannot be changed. (ie.  quickly cannot be changed to quick.)  Important:  After writing the sentence, players underline the grid words they used.  This makes it easier for the checker to check the grid words.

The Sentence Game,   Kids love playing this challenging sentence writing game.  Great way to practice grammar, capitalization, punctuation, and spelling.

Once all sentences are written, players pass their sentence/scoring sheet to the right.  These players score the sentence and write the score in the box on the right.


To play with your whole class, simply roll the dice once.  Every student in class will use that number to circle the words on their grid.  Once all the sentences are written, students can exchange their sheet with a partner for the scoring.

After your students understand how to play you can play a round anytime you need a time filler.  Students can keep their word grid and sentence/score sheet in a folder or their binder so it’s always handy. This game also works very well in a literacy center.

Click on this image to download The Sentence Game.

The Sentence Game,   Kids love playing this challenging sentence writing game.  Great way to practice grammar, capitalization, punctuation, and spelling.

Happy writing!
1


your photo name

The Best Classroom Pet Ever!


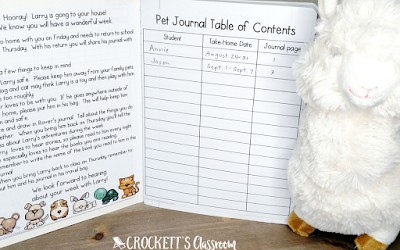
A stuffed animal is the very best classroom pet.  Kids love it and it's a great way to get kids to write in a home journal.

Have you thought about having a class pet, but don’t want to add one more thing to take care of in your classroom?  Well, I have the perfect solution---a take-home stuffed animal!  Kids love it and there is no cage or tank to clean out!


Having a traveling class pet was by far the most popular class pet I ever had.  Kids couldn’t wait for their week to take home the pet and have it be part of their life for a few days.  Of course, I had to include a journal for the kids to write in through the week.

Tips for having a take-home class pet.
1.  Choosing a stuffed animal is the easy part because kids love them all.  But, keep the size of the pet in mind.  Too large and it's difficult to transport home and then back to school.  Too small and it feels too much like a toy instead of a real pet.  

2.  Pick a traveling bag for your pet.  I like clear plastic bags so everyone can see the adorable pet inside.  Make sure it's large enough to hold the pet and the journal.   I found this bag on Amazon for under $10.  (Search "clear plastic tote" for lots of choices.)


3.  Decide on the requirements for the journal.  The requirements should be based on the writing level of your students.  Kindies can have a drawing journal where they draw a picture or two that shows what they did with the pet.  Firsties can write a few sentences along with illustrations.  For older students, they can write paragraphs and add illustrations.     Make sure all requirements and suggestions are included in the journal, so kids know exactly what is expected. 

A stuffed animal is the very best classroom pet.  Kids love it and it's a great way to get kids to write in a home journal.

4.  What will you use as a journal?  I like using a composition book.  It's sturdy and will last the whole year.  You can glue on a cover and then glue all instructions and suggestions to the inside cover.  

Click here to download this freebie from my TpT store. 

(Click on this image.)


5.  Make sure you share the journal on the day it's returned and before it goes home with a new student.  

6.  A letter home at the beginning of the year, explaining the Take-Home pet is a good idea.  That way, parents know what to expect.  I also let parents know the take-home schedule a few weeks in advance.  That way, the schedule can be adjusted if a family needs to reschedule the pet's visit to their home.

Above all, have fun.  Just like a live pet, the stuffed animal pet is a great way to teach responsibility. 


Do  your students want a classroom pet, but you don't want the mess?  Then I have the perfect pet for you!


12


your photo name

The KWL Chart -- New and Improved!


It's time to get rid of that old KWL chart!  Check out these versions that reflect what student learning really looks like.

      KWL charts have been around since the early 80’s.  Chances are you’ve used them either as a student or as a teacher,  maybe both. I remember thinking the traditional chart with three columns were wonderful.  I used them for so many of my science and social studies lessons and thought they really helped my students organize their thoughts and learning.  They guided a lot of our informative research and writing. 


    Well, it’s time to bring the KWL chart up-to-date.  I’ve found several really interesting ways this chart has been adapted.  Some are still simple and adaptable to many lessons, but others are more specific and may not fit with a wide range of activities.  Here’s what I found---

Traditional KWL
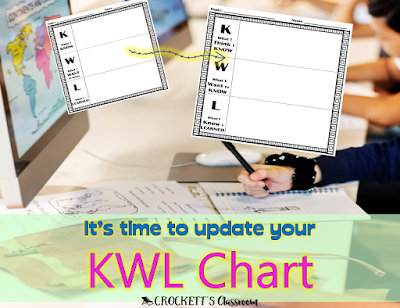
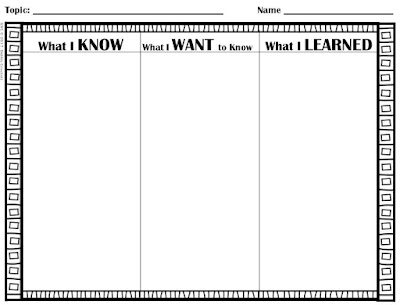
Let’s start with the oldie, but goodie.  The three columns stand for What I Know, What I Want to Know and What I Learned.  This is pretty straight forward and kids easily understand them.  After only a little whole class practice, students are able to use this chart on their own.  What I love about this chart is the versatility.  It can be used for almost any lesson or activity. (Click on image to download this organizer.)
Traditional KWL chart, simple and easy way to organize information for both literary and informative text

With the traditional KWL chart, it's simple and easy to organize information for both literary and informative text  
Literary Text--
K:  background knowledge    Students list what they know about the topic, characters, or setting.  Students can even list what they know about the genre.
W:  Want to find out.     Students can make predictions of what they think will happen. Predictions can be added or adjusted as they continue to read. Questions they want to have answered as they read the story can also be written here.  Then if the question is answered it can be moved over to the Learned column.
L:  Learned from the story.    Students can write a summary of the story, or the lesson learned in the story.  Their predictions can be checked and their questions can be answered.

Informative Text,  video or movie, science experiment --
K:  Previous knowledge     What knowledge do students already have about this topic.  This could come from previous experiences, books they’ve read, movies or TV shows they’ve seen.  It can also come from previous lessons or activities.
W:  Want to learn     What do the students hope or want to learn about the topic.  Questions are best for this column because they easily lead to searching for answers.

L:  Learned from the text       Any facts and information that students learn from the text can be written in this column. The facts do not have to pertain to what they wrote in the W column. But, if they do answer one of the questions from the W column, it can be moved over to the L column as they write the answer.


Thinking KWL Chart
I really, really like this KWL chart.  It values the knowledge that students already have about a topic but requires them to find evidence to support their ideas.  Let’s face it, kids know a lot, but it isn’t always accurate.  I also like the fluidity of this chart.  Instead of writing on the chart, I like to have kids write on small sticky notes.  These notes can then be moved from column to column as they read and research.  
This thinking KWL charts adds extra accountability to the traditional KWL chart.

Here’s how the three columns work;


K: What I Think I Know-  The first column is the biggest change from the traditional KWL chart.  Kids can write down any facts, background knowledge or information they think they know about the topic.  The emphasis, though, is that this “knowledge” may change once they begin researching or reading the text.  Perhaps they write “bears hibernate” in the first column. But, from their research, they find out that they don’t truly hibernate.  They go into a torpor or a deep sleep.  Bears can be woken up quickly and easily from this torpor state, unlike hibernating animals. The note about bears hibernating can now be updated and moved to the last column- What I know I Learned column.
W:  What I want to Know-  In this column students write notes about what they'd like to learn, or questions they have about the topic or story.  As they read and research, they can update these notes with their new knowledge and move the note to the last column.
L:  What I know I learned-  The last column is where all the notes from their research are collected.  Only notes that have text-based evidence can be placed in this column.   Notes from the first and second column are moved here as soon as they are proved by the research and reading.


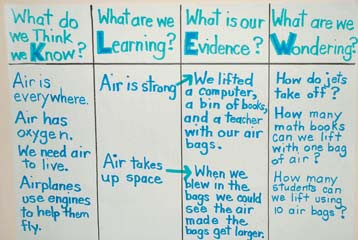
The next KWL chart comes from an article I read on the NSTA blog.  It describes a KLEW chart.  


KLEW chart from a third grade science lesson, One type of KWL chart reviewed in this blog post.
http://www.nsta.org/publications/news/story.aspx?id=51519
I like how this chart guides students through their research.  The first column lists what students think they know, just like in my Thinking KWL chart.  In the second column, they record what they are learning, followed by the third column which lists supporting evidence.  The last column lists questions for future research.  To read how a third-grade teacher used this in her science lesson you can read the full article here:  Evidence Helps the KWL Get a KLEW.


Is your KWL chart up to date?  Check out new ways to use this organizational chart with your students as they read literary and informational text.

0


your photo name

Spring Garden Writing Genre Project

Time to get outside and enjoy the beautiful spring weather!  Spring also means it's time for last minute test prepping!  Well, I have a fun way to review six different writing genres with your students.

In this engaging project students write six different papers, each about a garden, but each is also a different genre.  Sticking with one theme, but changing genres, will give students a better idea about the differences between writing genres.  Here are the genres and topics:
 Spring Garden Genre Writing from Crockett's Classroom on TPT.  This project will keep your kids engaged even though spring is in the air!
(Click on this image to see the packet in Crockett's Classroom on TPT)

The packet also includes an idea for an inside garden, six writing guidelines, six graphic organizers and six different publishing papers. You can have the students put all the finished papers together into a booklet.  Two different covers and an About the Author page is also included.  This makes a great project for end of the year conferences or open houses.


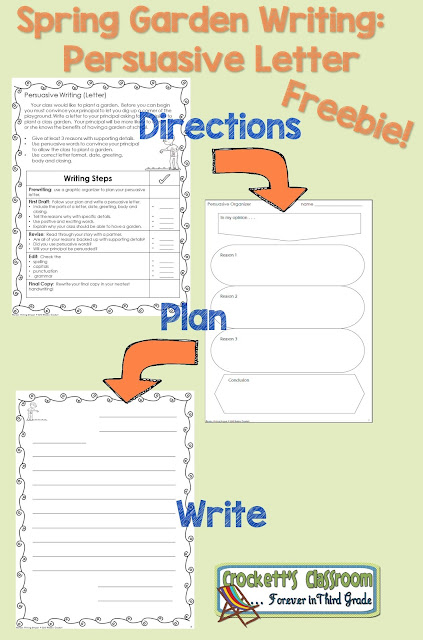
The best news is you can download and try the persuasive writing piece for free!  Click on either of these images to give it a try in your classroom.
 Ready for spring!  Get your kids excited about writing with this freebie from Crockett's Classroom.

 Spring is here!  It's not easy to keep students focused on their lessons when it starts to get warm and everything is turning green.  This writing project will keep your kids engaged and it's a great way to review six different genres of writing!

1


your photo name

Shades of Meaning

How to use Shades of Meaning in your Reading and Writing lessons.

When I first read the Common Core Standards I had never heard of shades of meaning.  Synonyms and antonyms had always been included in my vocabulary or word study lessons, but semantic gradients was a new concept.

But now I see how learning about the subtle differences in word meanings helps students with their comprehension and also helps them fine-tune their writing.

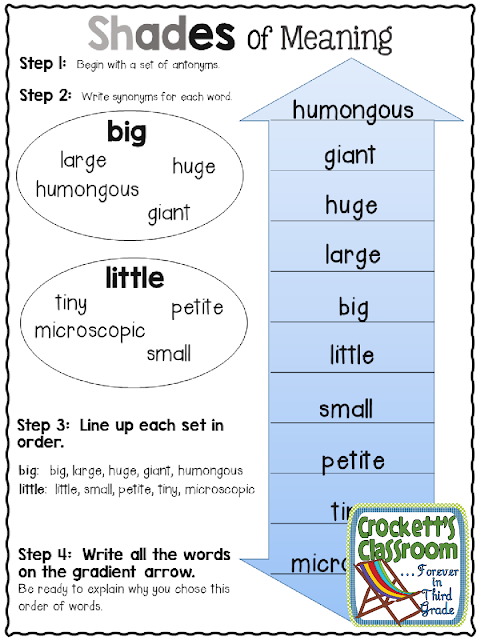
I made this simple slide that can be used to explore semantic gradients, or shades of meaning with reading or writing.  Here how you do it . . . 

Reading:

1.  Choose a sentence from a story you're reading with or to the class.  Here's an example from Because of Winn Dixie by Kate DiCamillo. And that dog came trotting over to me just like he had been doing it his whole life. (p. 10)   Write it on the slide, with the focus word on the cut out area.
 Shades of Meaning lesson for reading.---Crockett's Classroom

Shades of Meaning, using them in your reading and writing lessons2.  Now brainstorm with the class other words that mean a way to move.  They may come up with a list like this:  running, skipping, crawling, racing, jumping, hopping, creeping, strolling, or walking. 

3. Choose six of them, along with the original word to write on the paint chip slide. Write them in order from less intense to more intense.  Although there isn't just one way to arrange the words, students should be able to explain or justify the order they choose.

4.  Now put the paint chip through the slots on the sentence slide.  As you slide it through discuss how each word gently changes the tone, or mood of the sentence.  Discuss which word they think best expresses what the author is wanting to express in that part of the story.  Do they think the author chose the best word?  Why  or why not.


Writing

-During the revision step in the writing process students should
be taking a closer look at the words they've put in their writing
and deciding if it’s just the right word.  Ask them to choose one
sentence with a word they might want to change.
Example:  Henry ate his lunch under a tree.
-Brainstorm synonyms for ate; gobbled, devoured, gulped, nibbled,
munched, scarfed, inhaled, picked at.
-Choose six to write on the slide from less intense to more intense. 
Using shades of meaning to revise student writing.---Crockett's Classroom

picked at, nibbled, munched, ate, gobbled, scarfed, devoured.
There will not be an absolute right or wrong way to line up the words. 
Students should have time to justify the order they choose.
-Let the students try out each word to see how it affects the tone of the story.
-Things to discuss:  Which word better expresses what is going on in that part of the story?  Which word enhances the mood and works for that character and setting?

Click here to download the free 

Shades of Meaning activity.


 Shades of Meaning, ideas for using this skill in reading and writing.  Students get experience with arranging synonyms and then choose just the right one for their sentences.  In reading, students look more closely at words in the text that have similar meaning.


0


your photo name

Writing Genres


Are your students stuck when asked to write in different genres?  They'll love this writing project that introduces six different grenres.

Writing Genres:  Helping your students write in different genres.

I don't know the statistics, but I would guess that over 80% of your writing lessons focus on narrative writing.  I know I did in my classroom.  Once in a while I'd throw in a lesson on writing a letter, and once a year that animal research report, but not much else throughout the year.

A few years ago I attended a conference and one of the ideas presented was teaching the genres of writing through one topic.  I think the topic she used to demonstrate the idea was horses, an appealing topic for most kids.  She had her students write a fantasy story about a flying horse, an informative piece about caring for a horse, a persuasive piece about the best breed of horse, a poem about a horse and a descriptive piece about how it feels to ride a horse.  Using just one topic, horses, the students gained a much better understanding of the differences between the genres.
 Writing Genre chart


Light bulbs went on all over the room!  Every teacher began thinking about topics that would interest their students and would work easily with different genres. Since it was winter I came up with my first genre writing project with a snowman theme.  The kids loved it!  And I loved it too, because it was an easy way to introduce the different genres and get the kids exciting about writing.  The next year I added the scarecrow project to my fall writing schedule and followed up in the winter with the snowman project again.

I've polished these ideas and now have them available in my TPT store, along with a Spring Garden Writing project, added this past spring.

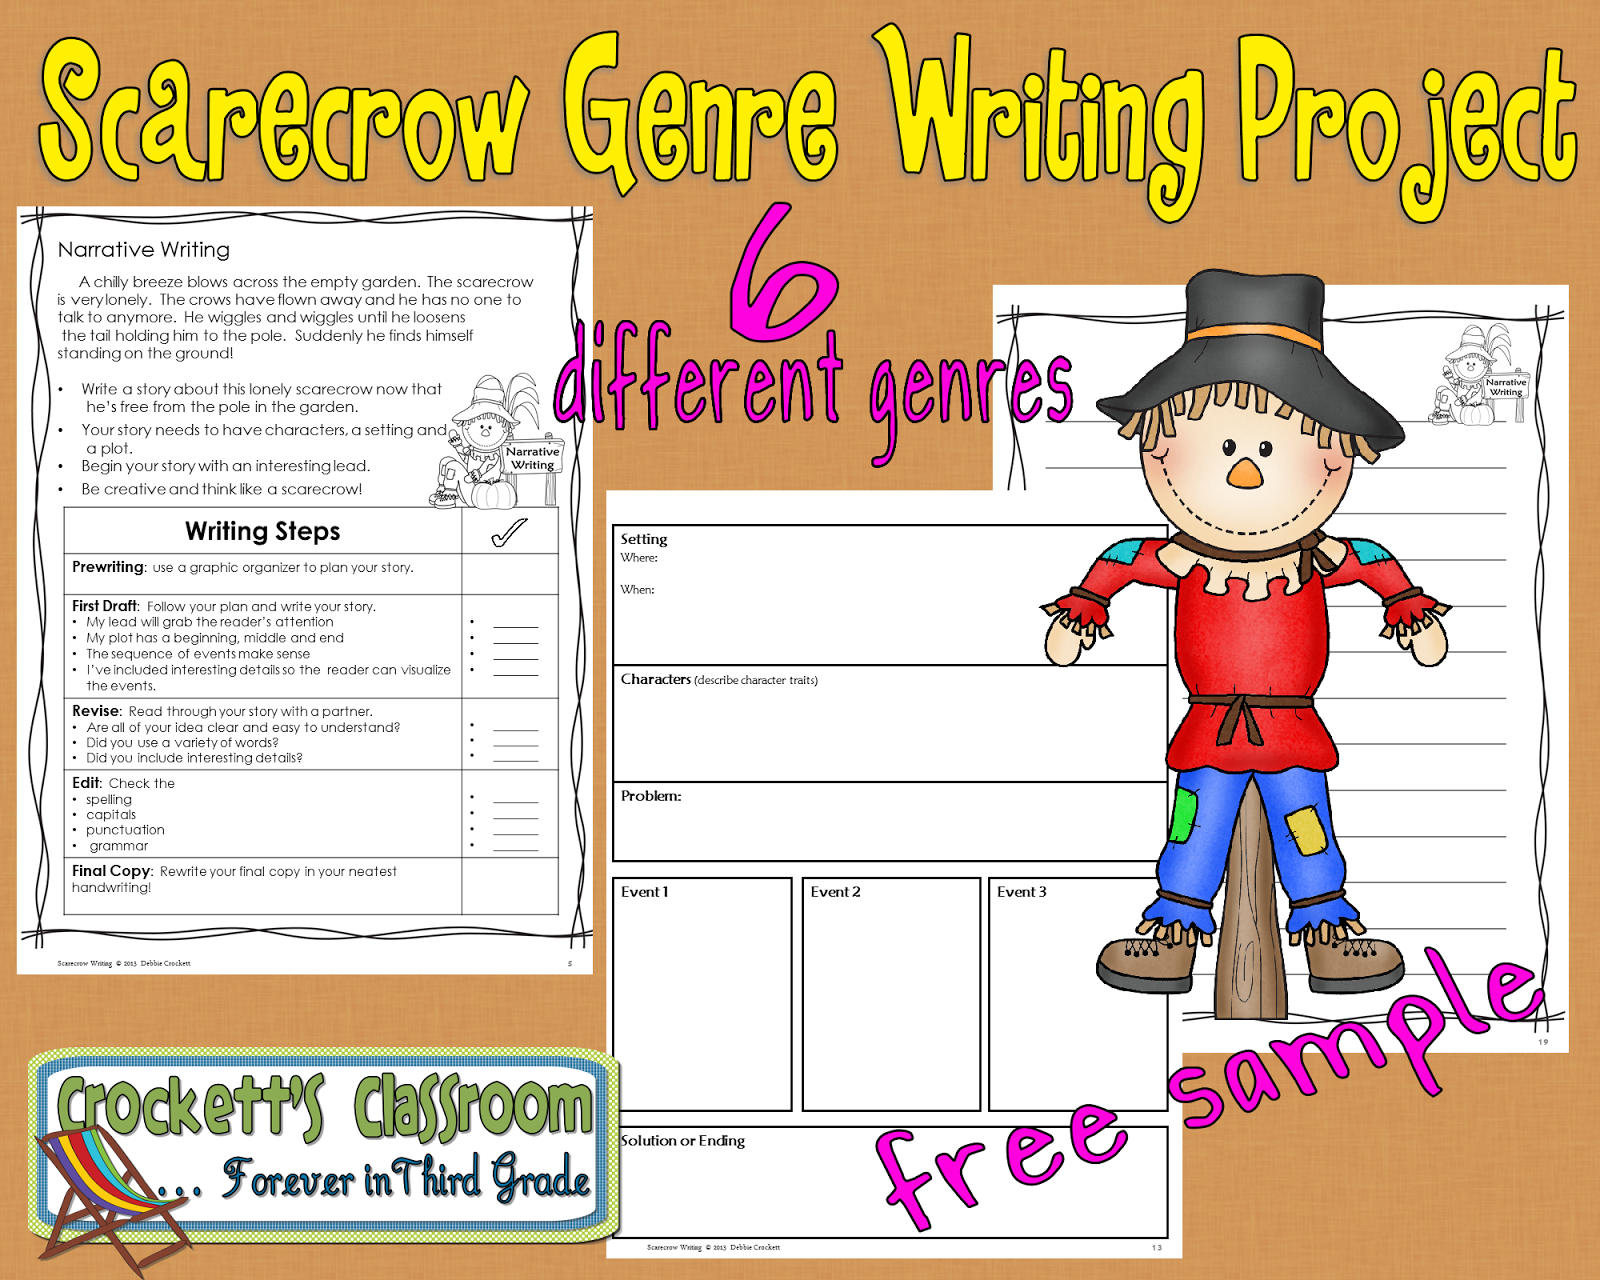
In each packet you'll find 6 different genres (the genres vary slightly with each project), writing guides/checklists, graphic organizers and final writing papers for publishing into a book. (Click on the image for a free sample from my Scarecrow Genre Writing Project) 
Scarecrow writing genre free sample

For more great ideas for Fall, head over to Teaching Science with Lynda.
 Fall Freebie Link- Up


And then check out Crockett's Classroom on TPT for all three genre writing projects:

 Snowman Writing Project--Crockett's Classroom
 Scarecrow Genre Writing Project--Crockett's Classroom
 Spring Garden Genre Writing Project--Crockett's Classroom


0


your photo name
Back to Top